Ethan Caldwell
Crypto specialist helping make complex crypto technologies easier to understand.
How to Create a Polygon (POL) Wallet
Table of Contents
Thanks to its low fees and quick transaction speeds, Polygon has become a go-to network for many crypto users. In order to use POL tokens, you’ll need a compatible Polygon wallet.
This article will guide you through creating a Polygon wallet. We'll explain key terms, provide clear instructions, and suggest a few reliable wallet options.
What Is a Polygon Wallet?
A Polygon wallet is a digital storage tool that allows you to manage Polygon-based tokens. It is used for storing, receiving, and sending coins.
These wallets are generally divided into two categories. Hot ones are made to handle regular transactions online, while cold options keep funds offline for secure long-term holding. Hot wallets are generally more convenient for both beginners and frequent traders, as modern platforms offer robust security while keeping funds readily accessible. Because it’s EVM-compatible, POL is supported by wallets that work with EVM chains.
What Is a Polygon Wallet Address?
A Polygon wallet address is a tool used to send, receive, and store POL and other assets on the Polygon network. Anyone you have sent your address to can see it and check through blockchain explorers, but only someone with a private key may access the POL within it.
That address is typically a 42-character string of letters and numbers that begins with 0x. Here's an example of a Polygon wallet address:
’0xAbCdEf1234567890AbCdEf1234567890AbCdEf12’.
How to Create a Polygon Wallet?
There are many popular crypto wallets that support Polygon, and creating one follows a very similar process across all of them. There’s a general guide on how to create a Polygon wallet:
- Pick a wallet provider.
- Create your account.
- Secure your account with PIN and 2FA.
- Pass KYC verification if it’s required.
- Top up your account.
Creating an account and ensuring its security is necessary before setting up a wallet. For instance, on Cryptomus, you first need to sign up and choose a strong password. You can then enhance your wallet by activating additional options, such as two-factor authentication and a PIN code, to improve protection.
Not all wallets may automatically connect to Polygon, so you may need to enter specific details, such as a contract address, to add it. All the essential information can be found in the Polygon official documentation.
Crypto Wallets That Support Polygon
As for the types of online Polygon wallets, your options fall under these categories:
-
Custodial: they manage your private keys and make accessing your crypto simple. Many also provide features like trading, staking, or portfolio management.
-
Non-custodial: those let you handle your own private keys, which gives more control and more responsibility. If you fail to store backups properly and lose your keys, access to your POL cannot be lost.
There are multiple providers you could try, and the choice still depends on your priorities. But it’s essential to mention that Cryptomus could be considered the best Polygon wallet for beginners due to its simple interface, high security, and commission-free transfers within the platform. It also offers a vast scope of financial features like a built-in converter, a blockchain explorer, and access to a spot exchange.
How to Make Transactions with a Polygon Wallet?
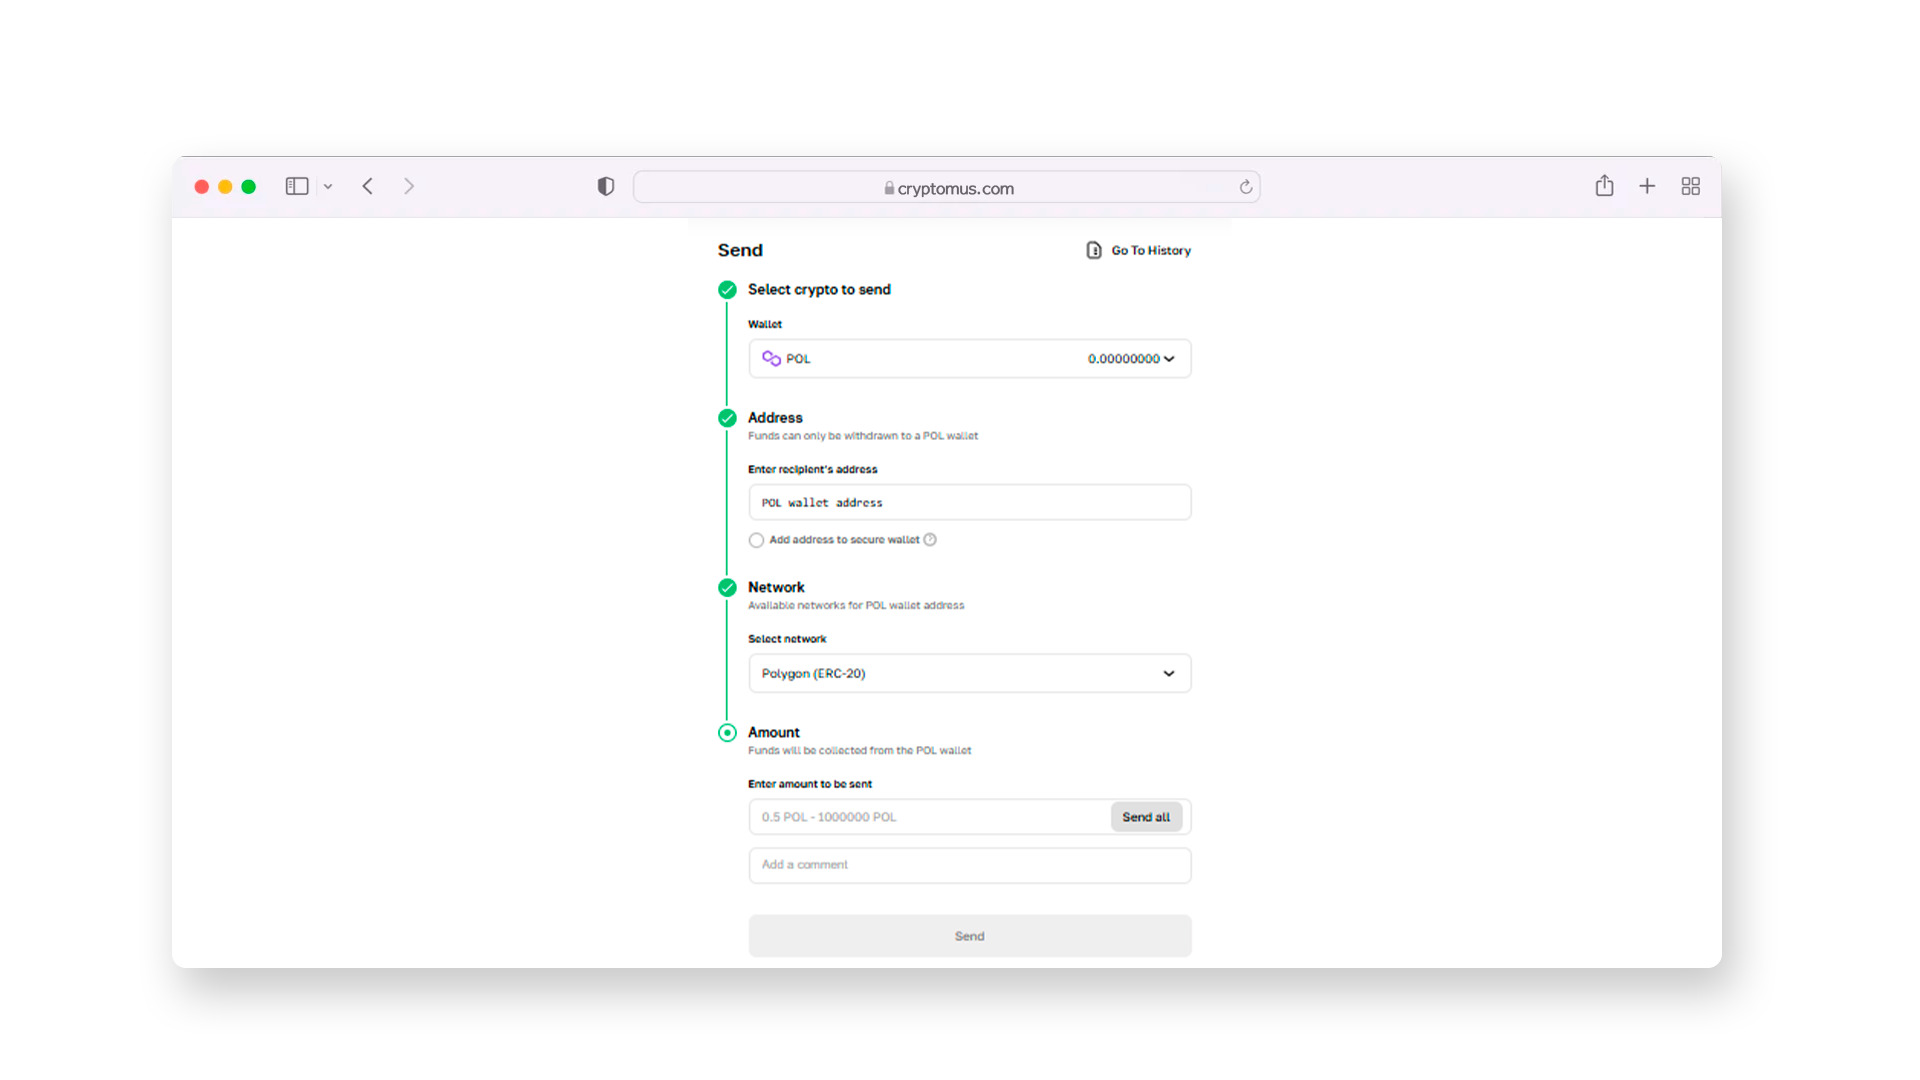
Now, let’s explore how you could make transactions. To send tokens to someone, do this:
- Open your Polygon wallet.
- Go to the "Send" or "Transfer" section.
- Select tokens you’d like to send and a network.
- Paste the recipient's wallet address.
- Specify the token amount.
- Review and confirm by entering a 2FA code.
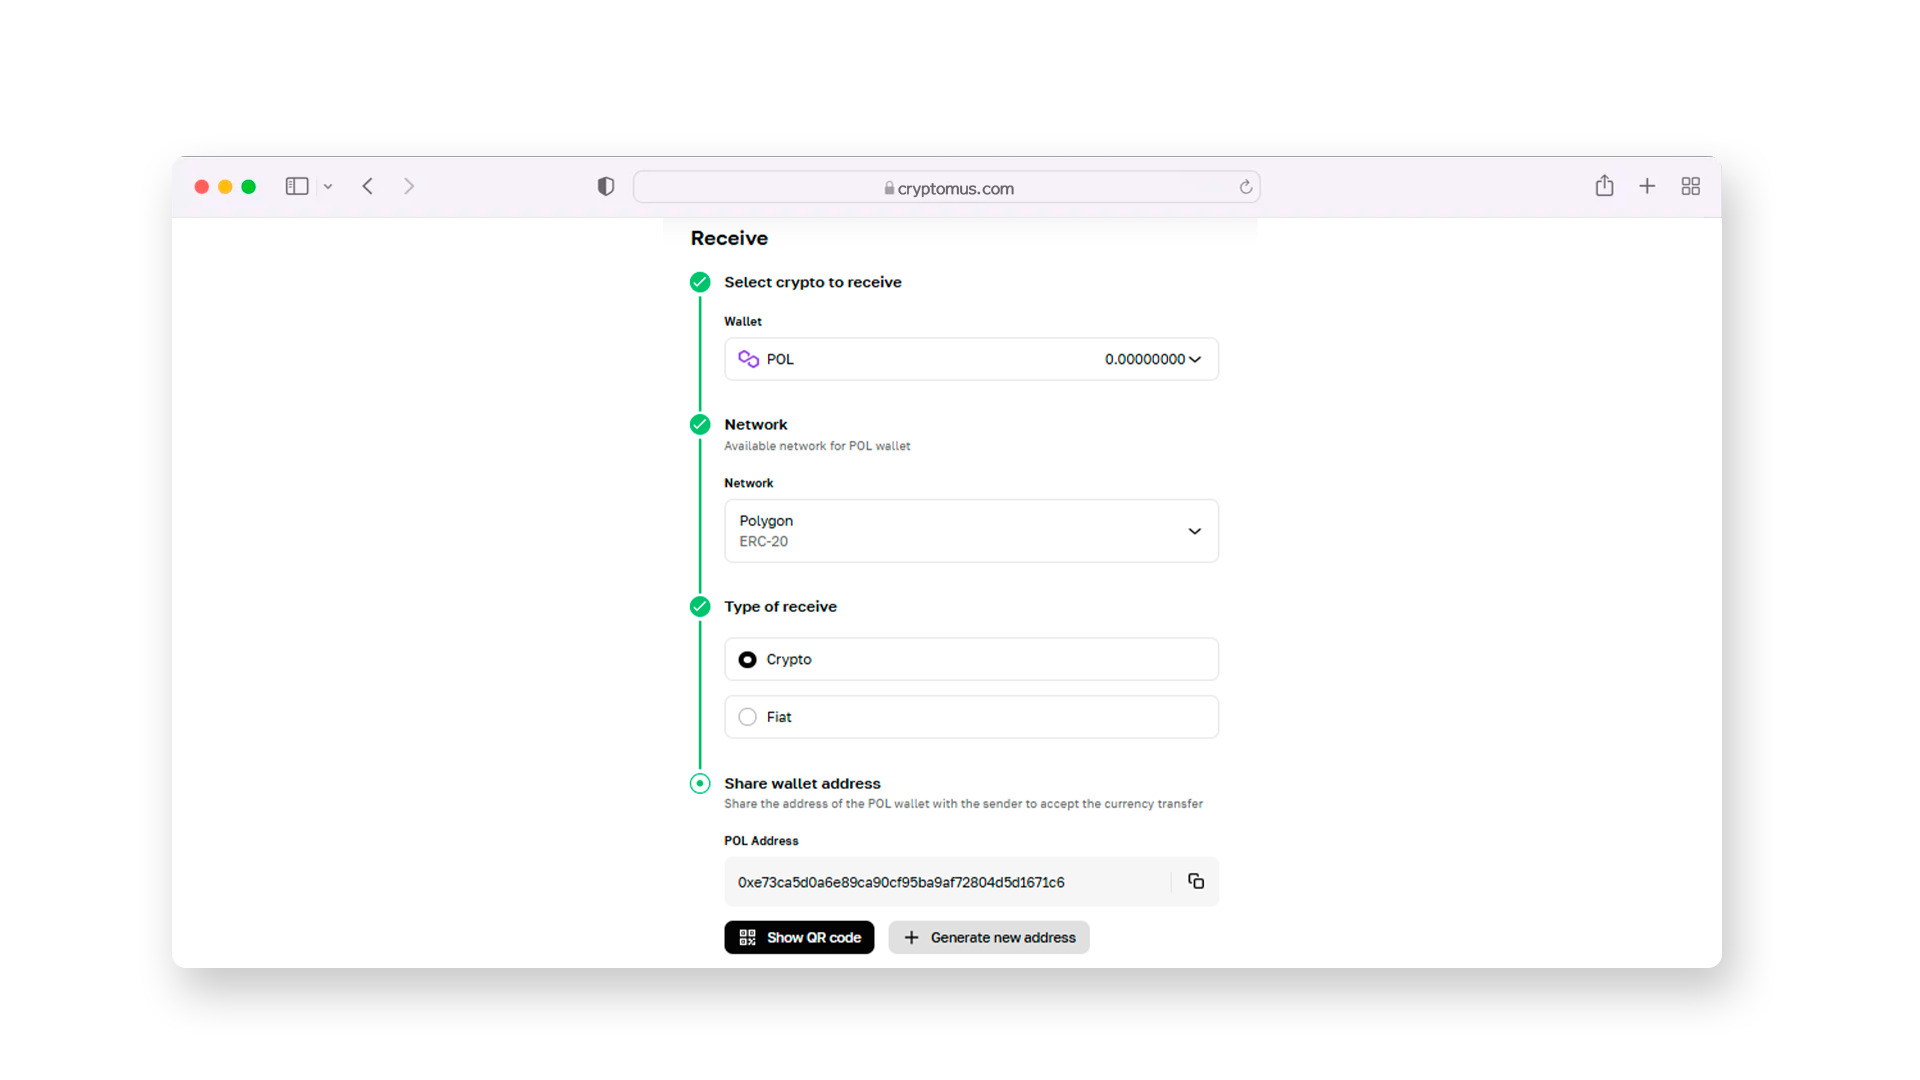
To be able to receive tokens, follow these steps:
- Go to your Polygon wallet.
- Move to the "Wallet address" or "Receive" section.
- Find your wallet address and copy it.
- Share the address with the sender.
Congratulations! You should be able to create a Polygon wallet to trade, store, and interact with the POL network in general. We hope that this article helped you to get started on Polygon.
Feel free to leave your comments and questions about the matter down below, and we'll be more than willing to talk with you and engage in dialogue. Let's chat!


Simplify Your Crypto Journey
Want to store, send, accept, stake, or trade cryptocurrencies? With Cryptomus it's all possible — sign up and manage your cryptocurrency funds with our handy tools.
Get Started