

Logan Brooks
Crypto expert explaining blockchain technologies in a clear and accessible way.
How to Accept Cryptocurrency Payments with a Payment Plugin for BILLmanager
Table of Contents
As the world increasingly embraces cryptocurrencies, businesses are seeking ways to integrate this digital revolution into their payment systems. Accepting cryptocurrency payments on your website not only expands your customer base but also provides a secure and efficient payment method for your users.
In this article, we will explore the step-by-step process of accepting cryptocurrencies on your website using the powerful and user-friendly BillManager Payment Plugin. Whether you're a small business owner or an e-commerce giant, this guide will walk you through the setup and integration of the plugin for BillManager, allowing you to tap into the vast potential of cryptocurrency transactions.
Discover how you can enhance your online business and cater to the growing demand for alternative payment options with the help of BillManager.

What is the BillManager payment plugin?
The BillManager payment plugin is a versatile and user-friendly solution designed to help website owners seamlessly accept cryptocurrency payments. With its robust features and easy integration, BillManager simplifies the process of incorporating cryptocurrencies into your online payment system. The set of available coins and networks is defined in your Cryptomus merchant settings, providing your customers with flexible payment options and ensuring a smooth checkout experience.
How to accept crypto payments with BillManager cryptocurrency Payment Plugin
Now we will walk you through the simple steps to start accepting crypto payments using the powerful features and seamless integration of the BillManager Payment Plugin.
Getting the BillManager cryptocurrency payment plugin
The plugin is free and is enabled for a specific server, so we start with a request to our support team.
- Contact Cryptomus support and ask to enable the free Cryptomus plugin for BillManager.
- Provide the IP address of the server where BillManager is installed, your billing domain and your Merchant ID.
- Wait for confirmation that the plugin has been enabled — this usually takes a few minutes.
Until the plugin is enabled for your server, the repository will not be available and the installation will fail with a 403 Forbidden error.
Installing Cryptomus cryptocurrency payment gateway for BillManager
The instructions apply to BillManager 6 on AlmaLinux 9, Ubuntu 20.04 and Ubuntu 24.04. You will need SSH root access to the server.
- In the server management console connect the ISPlicense repository. The commands depend on the operating system of your server.
# AlmaLinux 9
curl -fsSLO https://repo.isplicense.ru/release/el9/isplicense-release.rpm
rpm -Uhv isplicense-release.rpm

# Ubuntu 24.04
curl -fsSLO https://repo.isplicense.ru/release/24/isplicense-release.deb
dpkg -i isplicense-release.deb

# Ubuntu 20.04
curl -fsSLO https://repo.isplicense.ru/release/20/isplicense-release.deb
dpkg -i isplicense-release.deb
- Install the plugin from the connected repository.
# AlmaLinux
dnf install -y cryptomus-isplicense

# Ubuntu
apt update && apt install -y cryptomus-isplicense
Once the installation is complete, the panel restarts automatically. The plugin is installed.
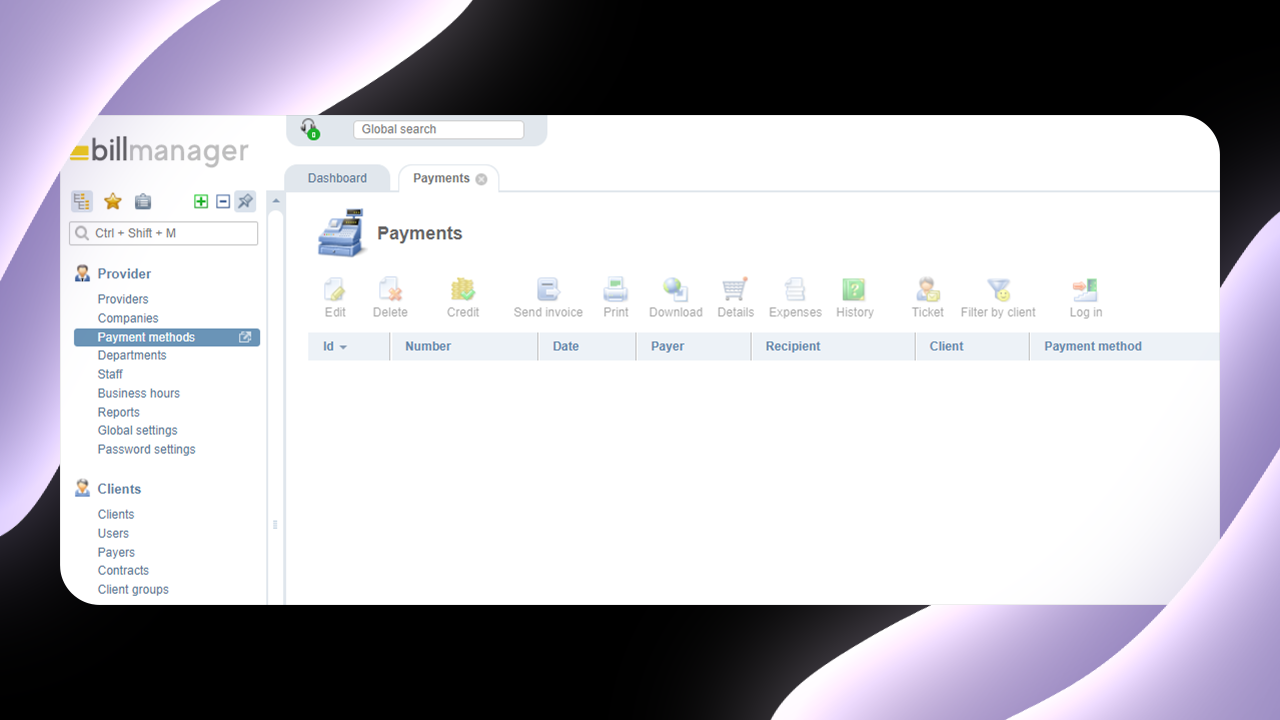
- In the left menu of the personal cabinet/dashboard find the item Provider and from the drop-down menu click on Payment methods.
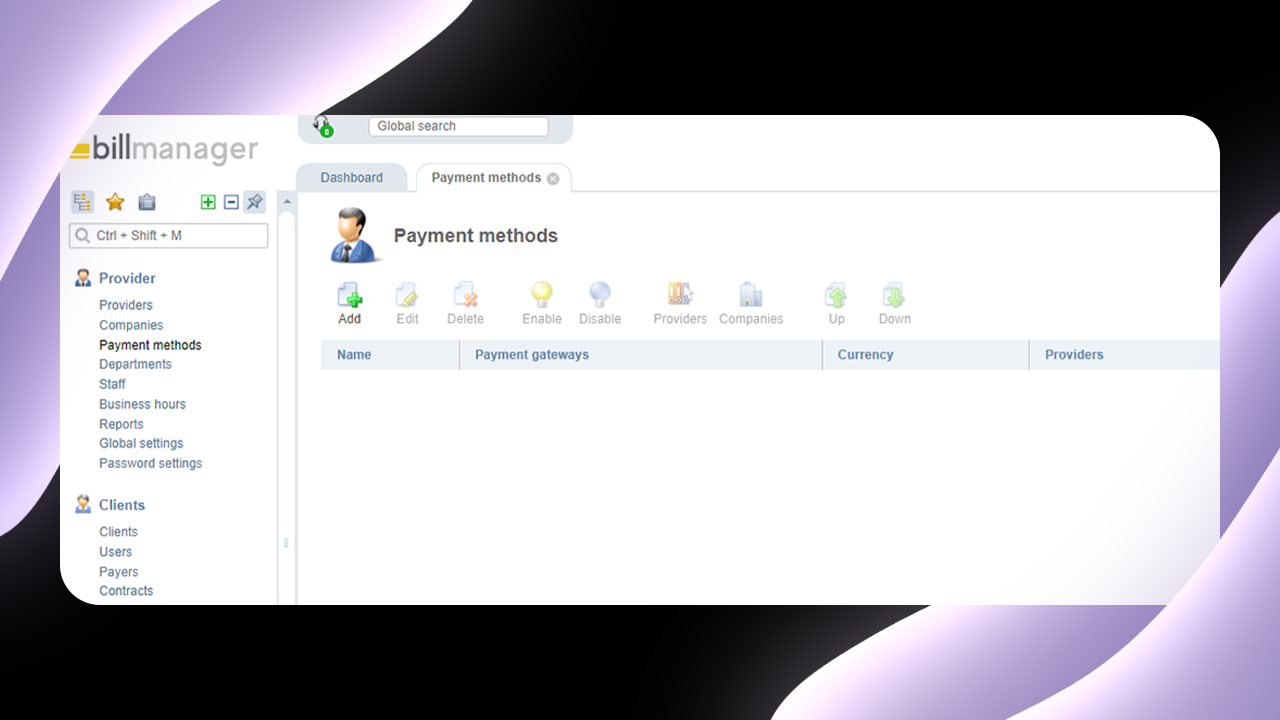
- We get to the Payment methods page, now click on Add.
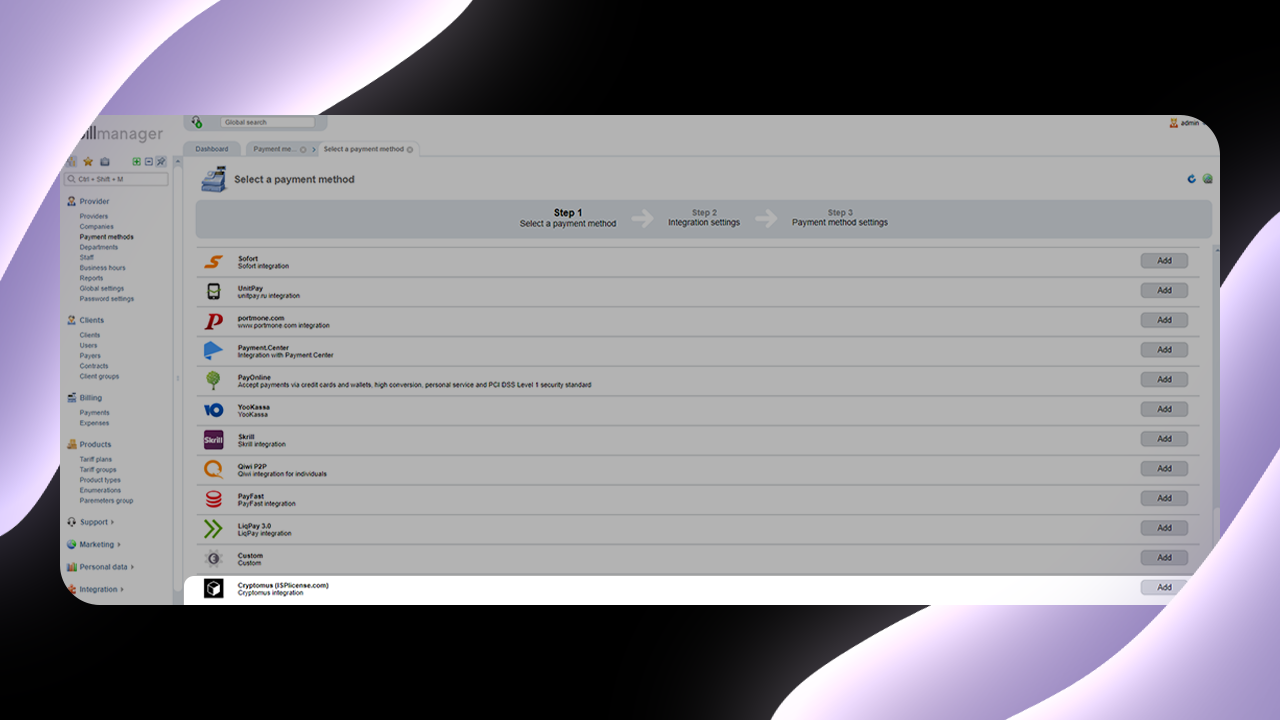
- On the Select a payment method page find the Cryptomus (ISPlicense.com) module and click on the Add button to the right of the module.
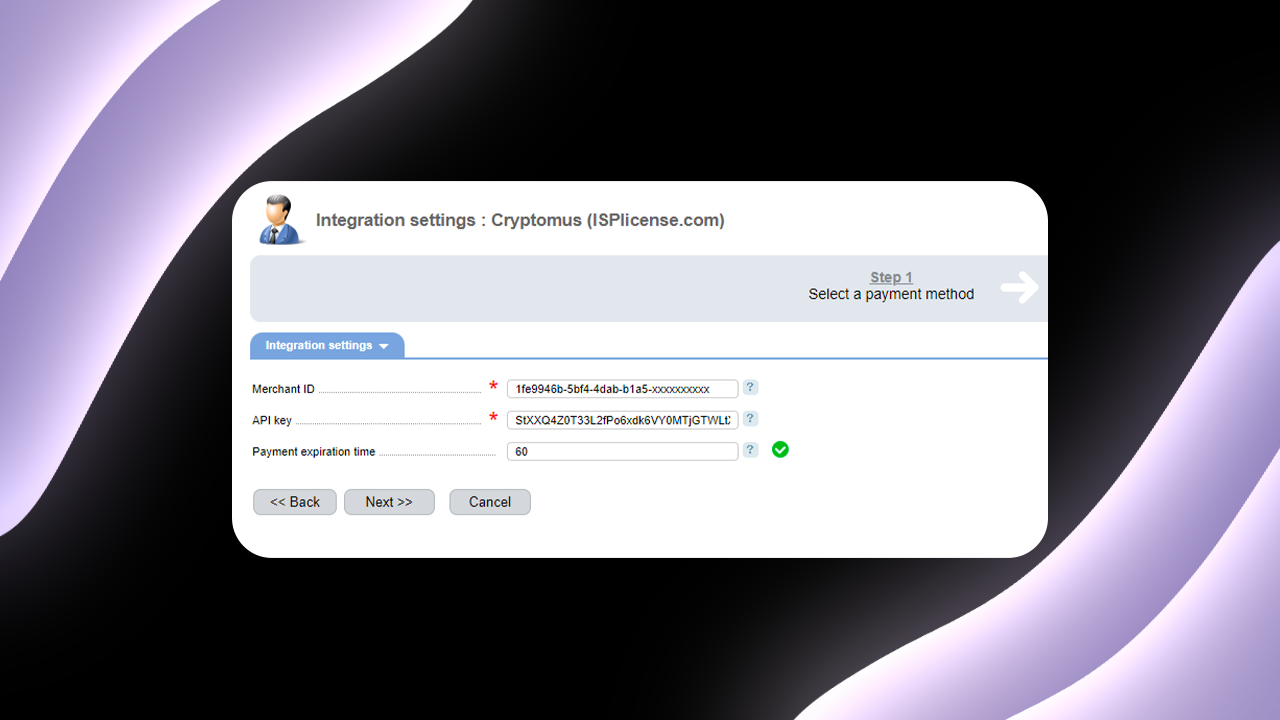
- Go to the page of integration settings and enter API key and Merchant ID received after registration and set the payment validity time (in minutes) then click Next.
- We get to the page of payment method settings. Here you set the name of the payment method, choose the currency for which the payment method will be applied, load the Cryptomus icon, set the minimum payment amount and other settings necessary for you. Click Finish
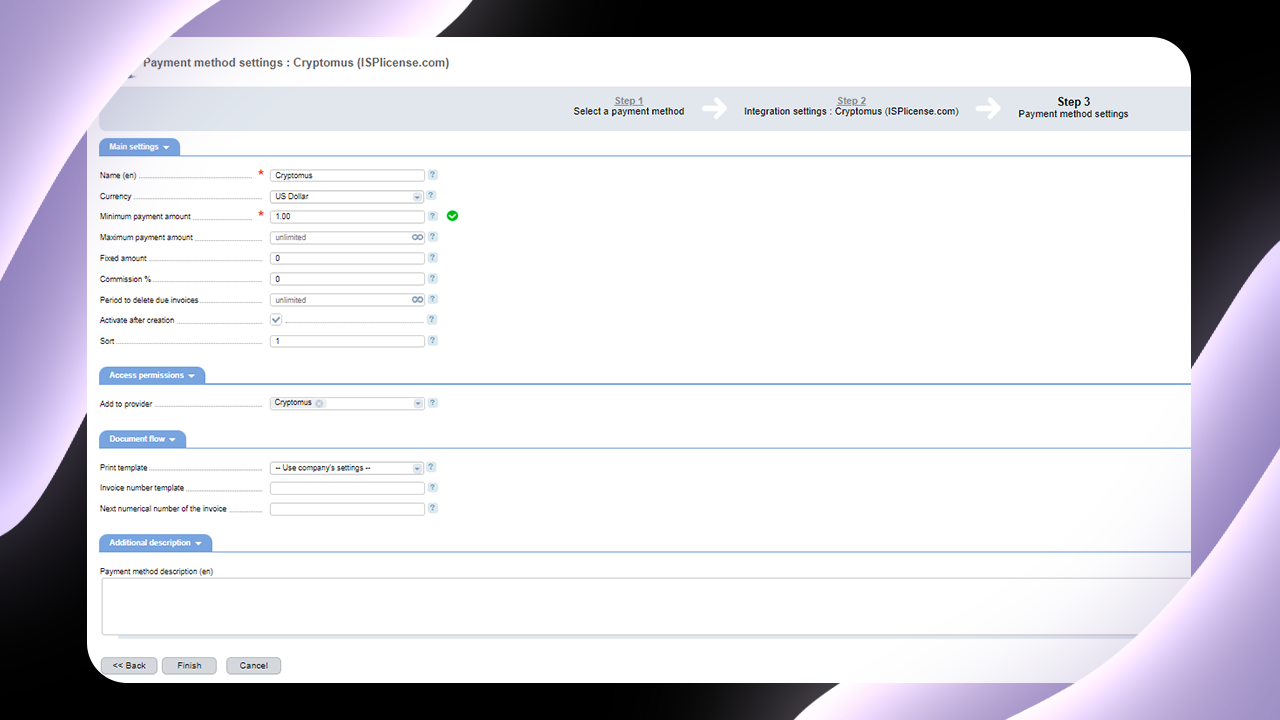
- Congratulations, the payment module is installed, configured and available for your customers as a payment method.
In conclusion, the BillManager Payment Plugin offers a hassle-free solution for accepting cryptocurrency payments on your website. By incorporating this powerful tool into your online payment system, you can tap into the growing popularity of cryptocurrencies and cater to the preferences of modern-day customers.
With its user-friendly interface, extensive compatibility, and robust features, BillManager simplifies the process of integrating crypto payments, ensuring a seamless checkout experience for your users. Don't miss out on the opportunity to expand your business and embrace the future of digital transactions. Start accepting crypto payments with the BillManager Payment Plugin today and unlock new possibilities for your online ventures.






Simplify Your Crypto Journey
Want to store, send, accept, stake, or trade cryptocurrencies? With Cryptomus it's all possible — sign up and manage your cryptocurrency funds with our handy tools.
Get Started