Integration Guide
Table of Contents
When talking about cryptocurrencies as a payment method, it should be remembered that the process of paying with them is different from classic payment methods such as bank cards or e-wallets. Therefore, when customers use this payment method in a web service or application, they should know a few tips on how to make the payment process convenient and simple.
First steps
There are various types of integrations: API, plugins, buttons, payment links.
Regardless of the type of integration you choose, first you will need to complete three simple steps:
Step 1
Registration – enter your email address or phone number. After confirmation, you will log in to your account.
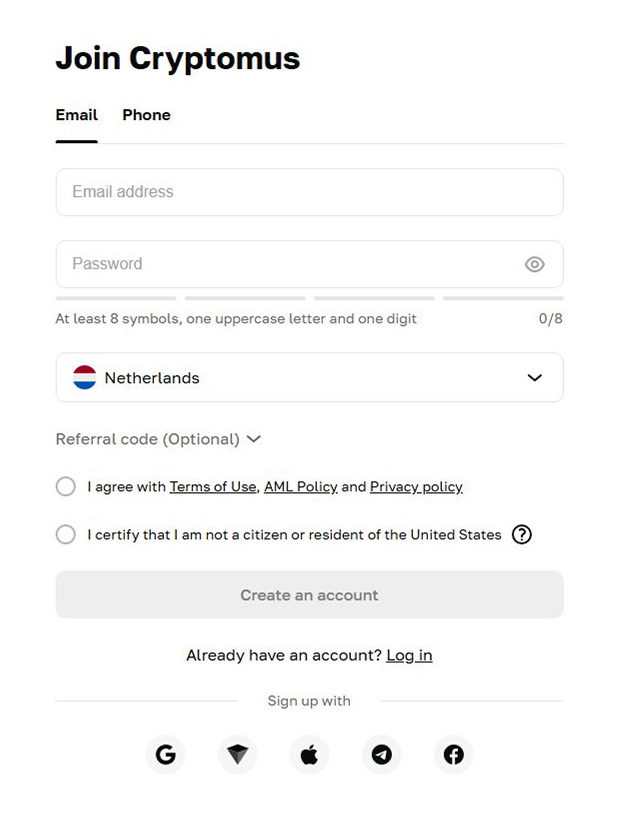
Step 2
➜ Create a project (Merchant) – Go to the Business tab.
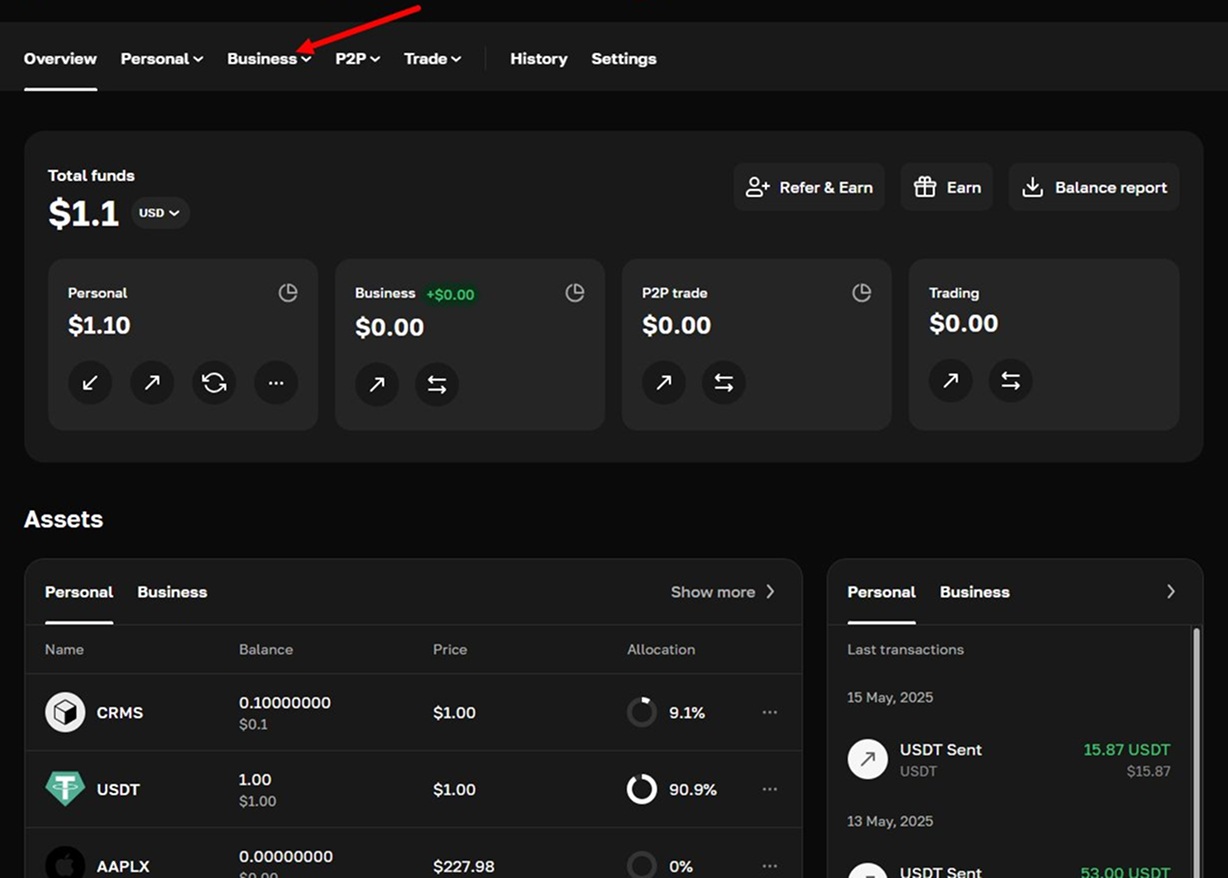
➜ Click the ”Create a Merchant” button.

➜ Enter the project name.
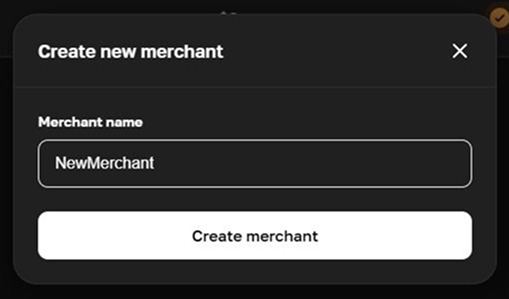
Step 3
Choose the type of integration or skip this step for now.
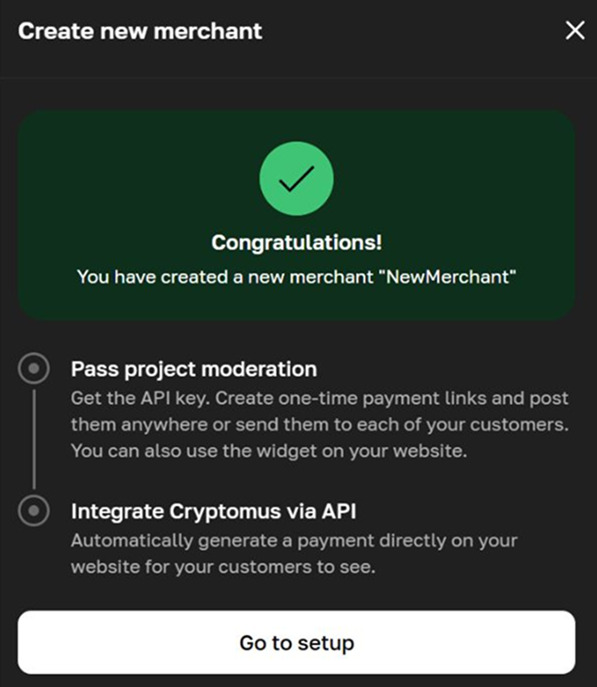
You have successfully created your new project! Now you have two wallets.
Personal wallet – this is your wallet where you can simply store, convert, and transfer your cryptocurrency.
Business wallet – this is the wallet where you can create new projects, issue invoices, set up widgets, view payment statistics, and use many other functions.
Now let’s talk about the types of integration.
Types of integration
How to understand which type of integration is right for you?
Payment by link
This is the simplest way to start accepting cryptocurrency payments with Cryptomus.
This feature allows users to create an account without creating a website and connecting Cryptomus to it.
Step 1
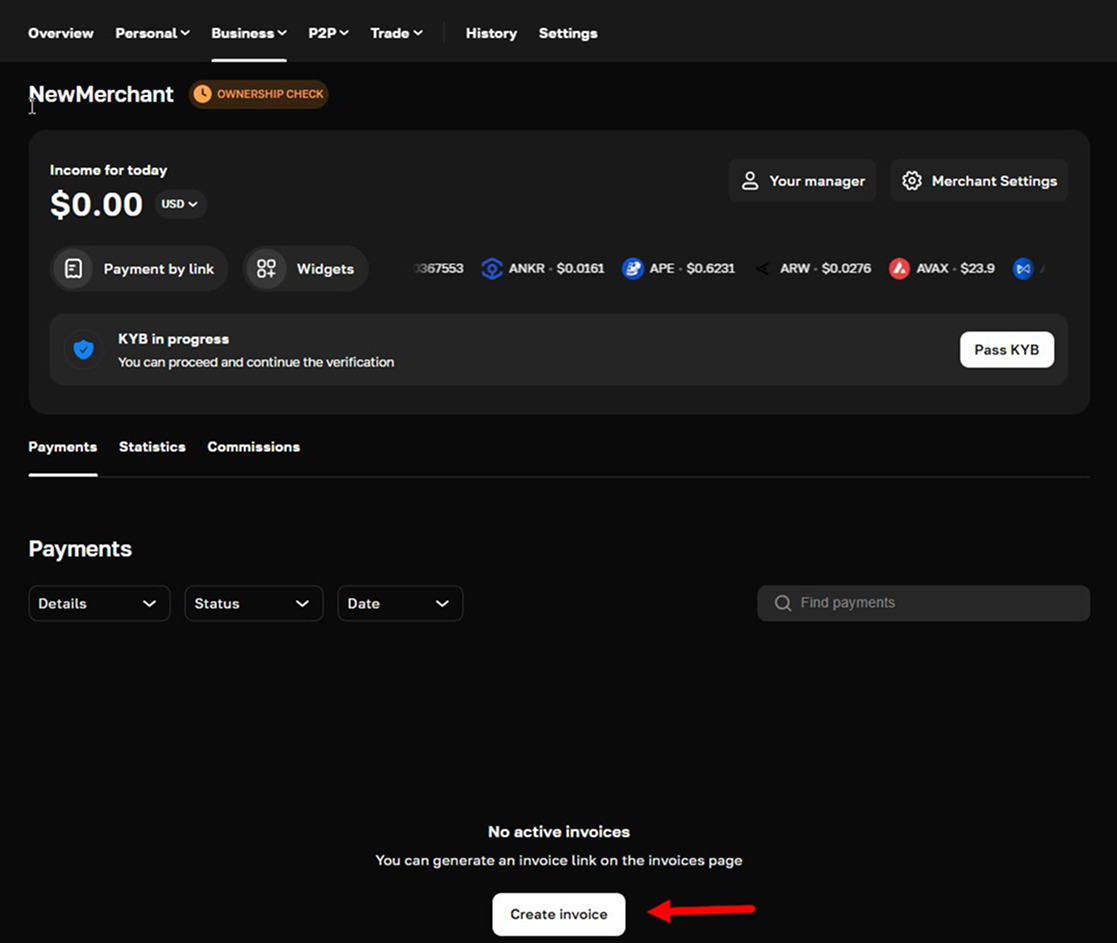
➜ On the main page of your merchant account click ”Create invoice”
Step 2
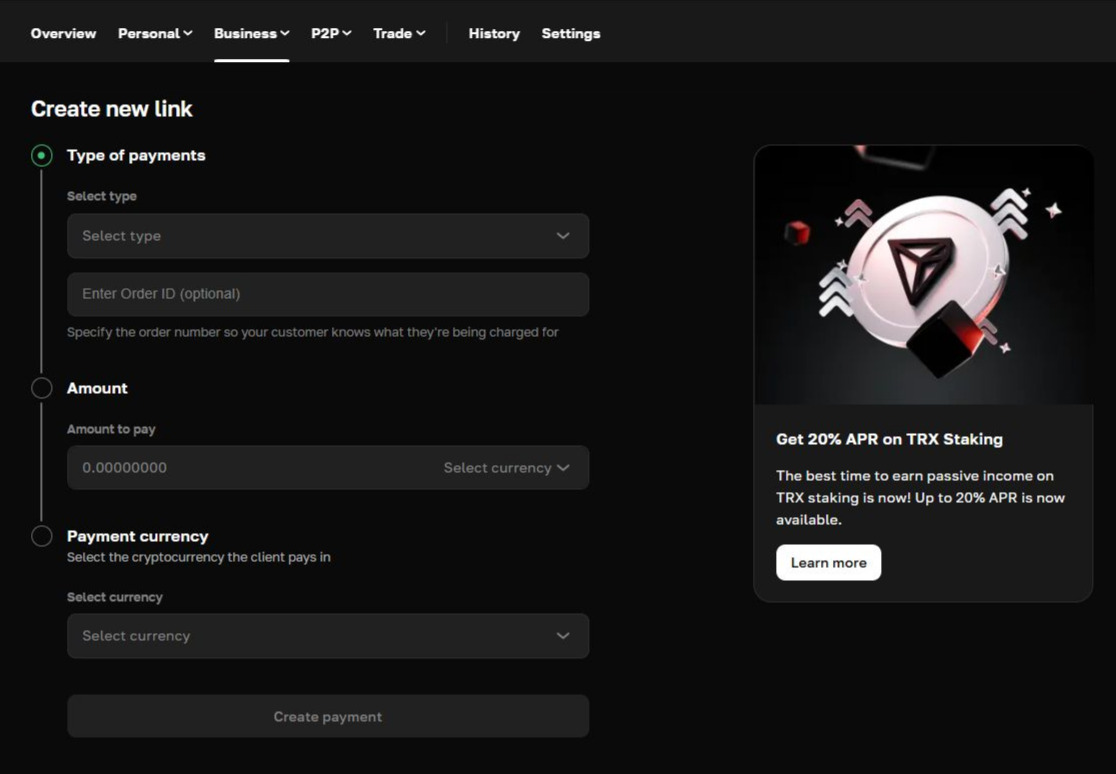
➜ Fill in the payment details.
Step 3
➜ Click ”Create payment”.
Anyone can do this from anywhere. There is no need to go through the integration process – just create your account and generate invoices right on the spot.
This makes it easy to receive funds, especially if you are waiting for a money transfer, a salary, or simply need a link with a convenient payment interface.
Generate an invoice, send the link by email, in a messenger, or just leave it somewhere and receive money! This method can also be used in regular stores and offline businesses.
Plugins
-
WooCommerce: WooCommerce crypto gateway
-
OpenCart: add payment gateway in OpenCart
-
PrestaShop: add payment gateway in PrestaShop
-
Shopify
-
BillManager
-
RootPanel
-
XenForo
-
PHPShop
-
Tilda
And many others, all of them are available on the Cryptomus Plugins page.
API
Check out our API documentation and integrate using your API key.
To issue an API key for receiving funds:
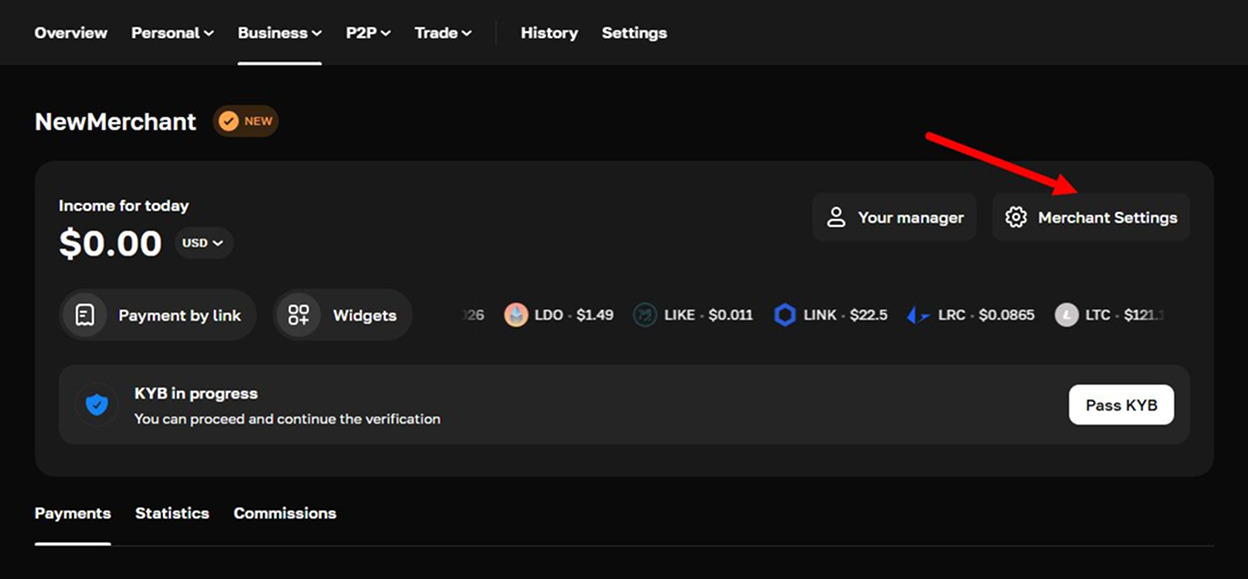
➜ Go to your Merchant → Settings
➜ Go to the Leave a request tab
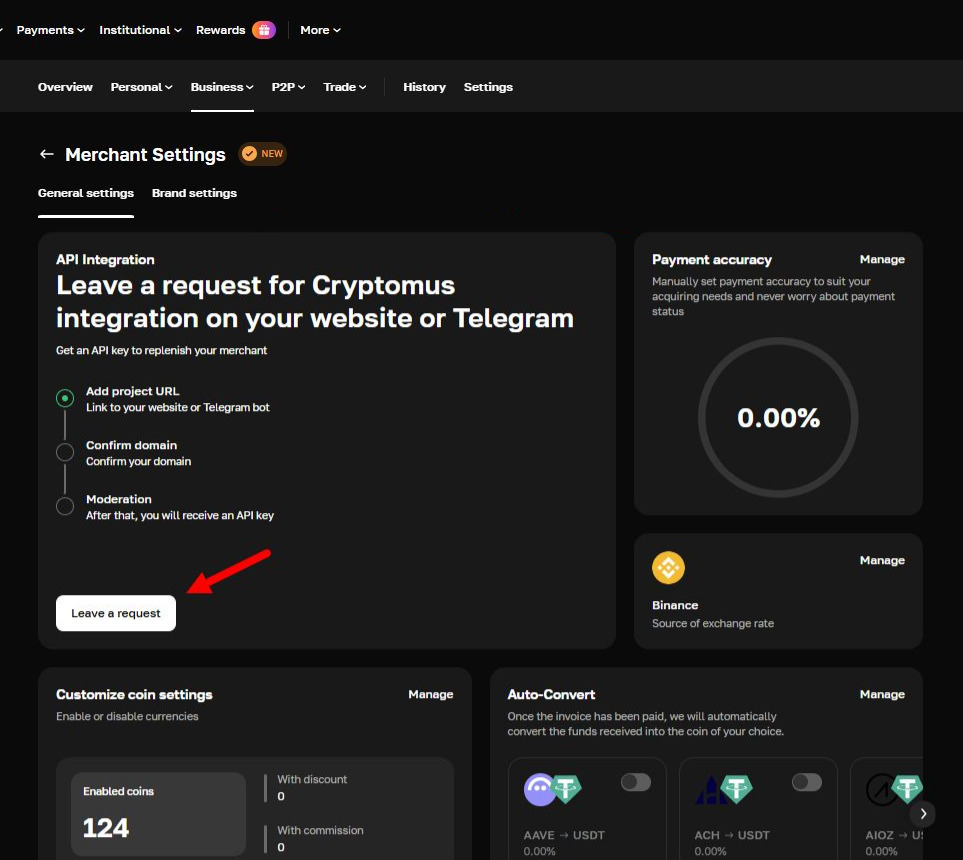
➜ Enter your website address and short description
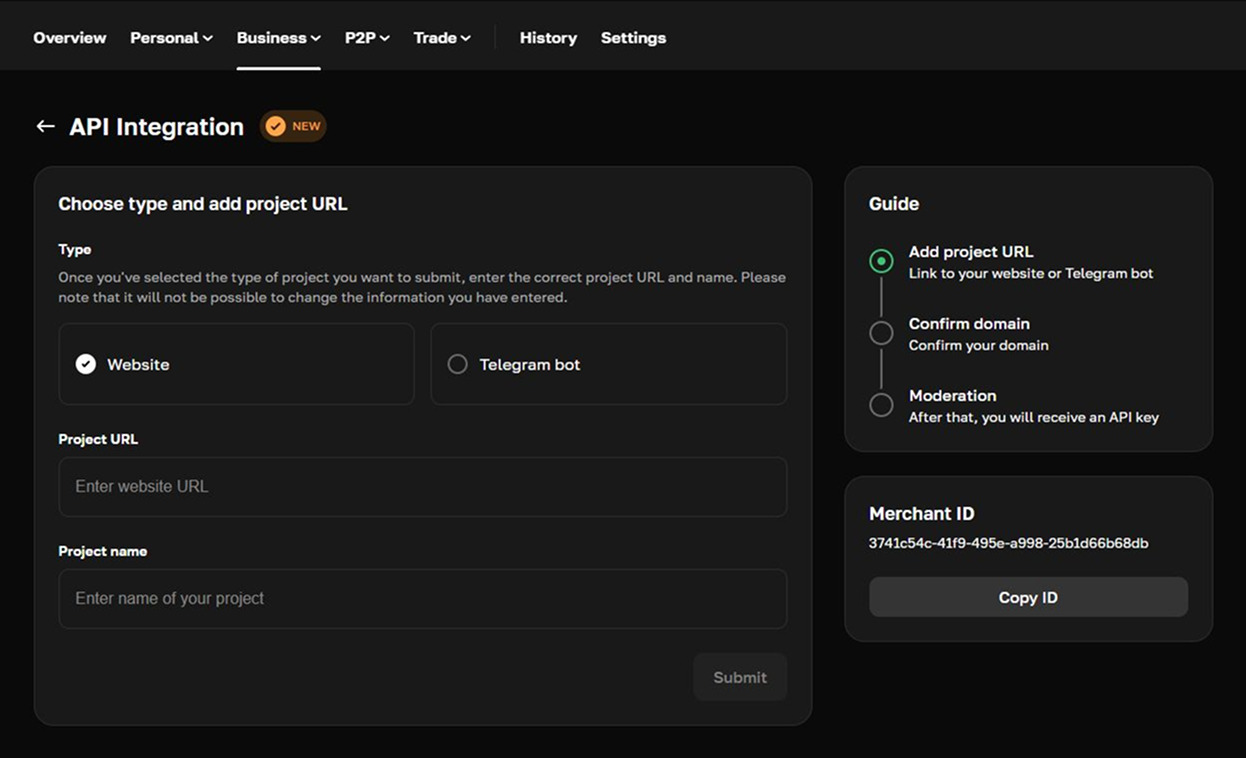
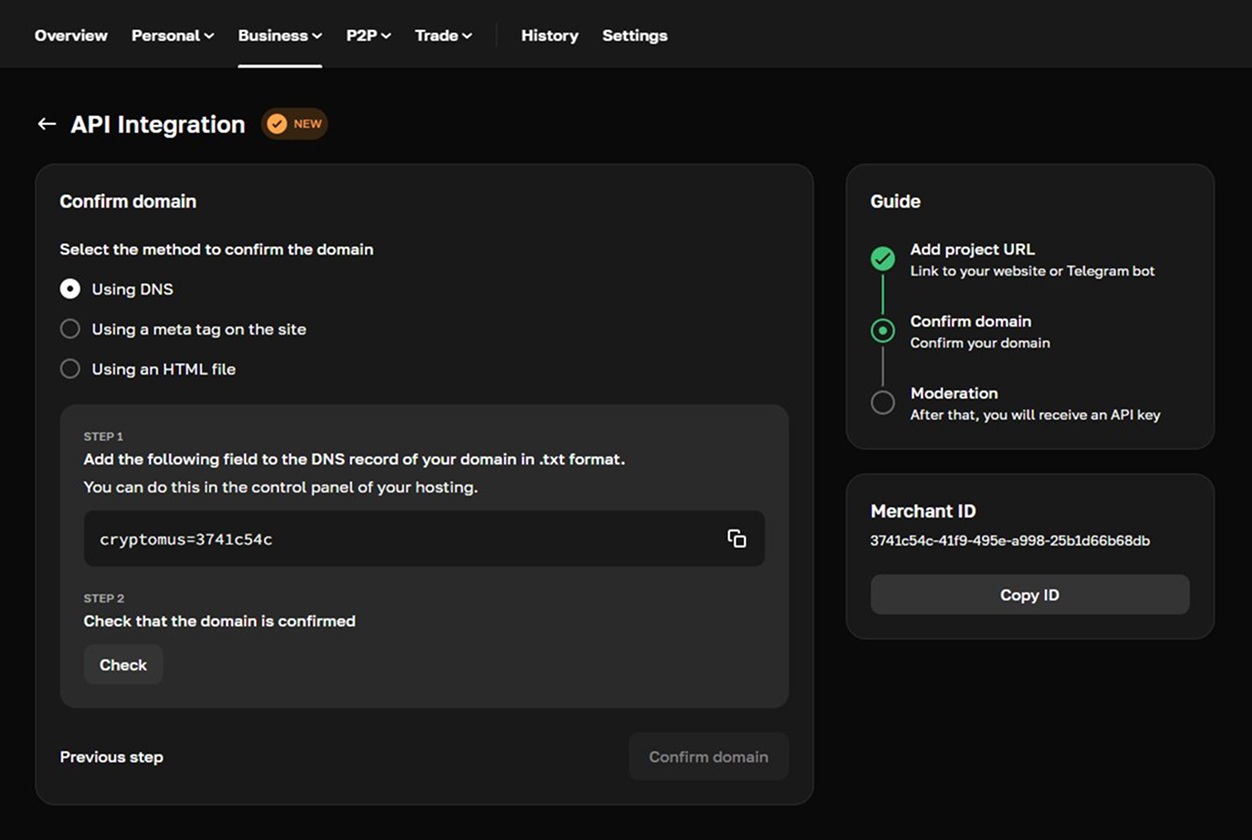
➜ Confirm your domain
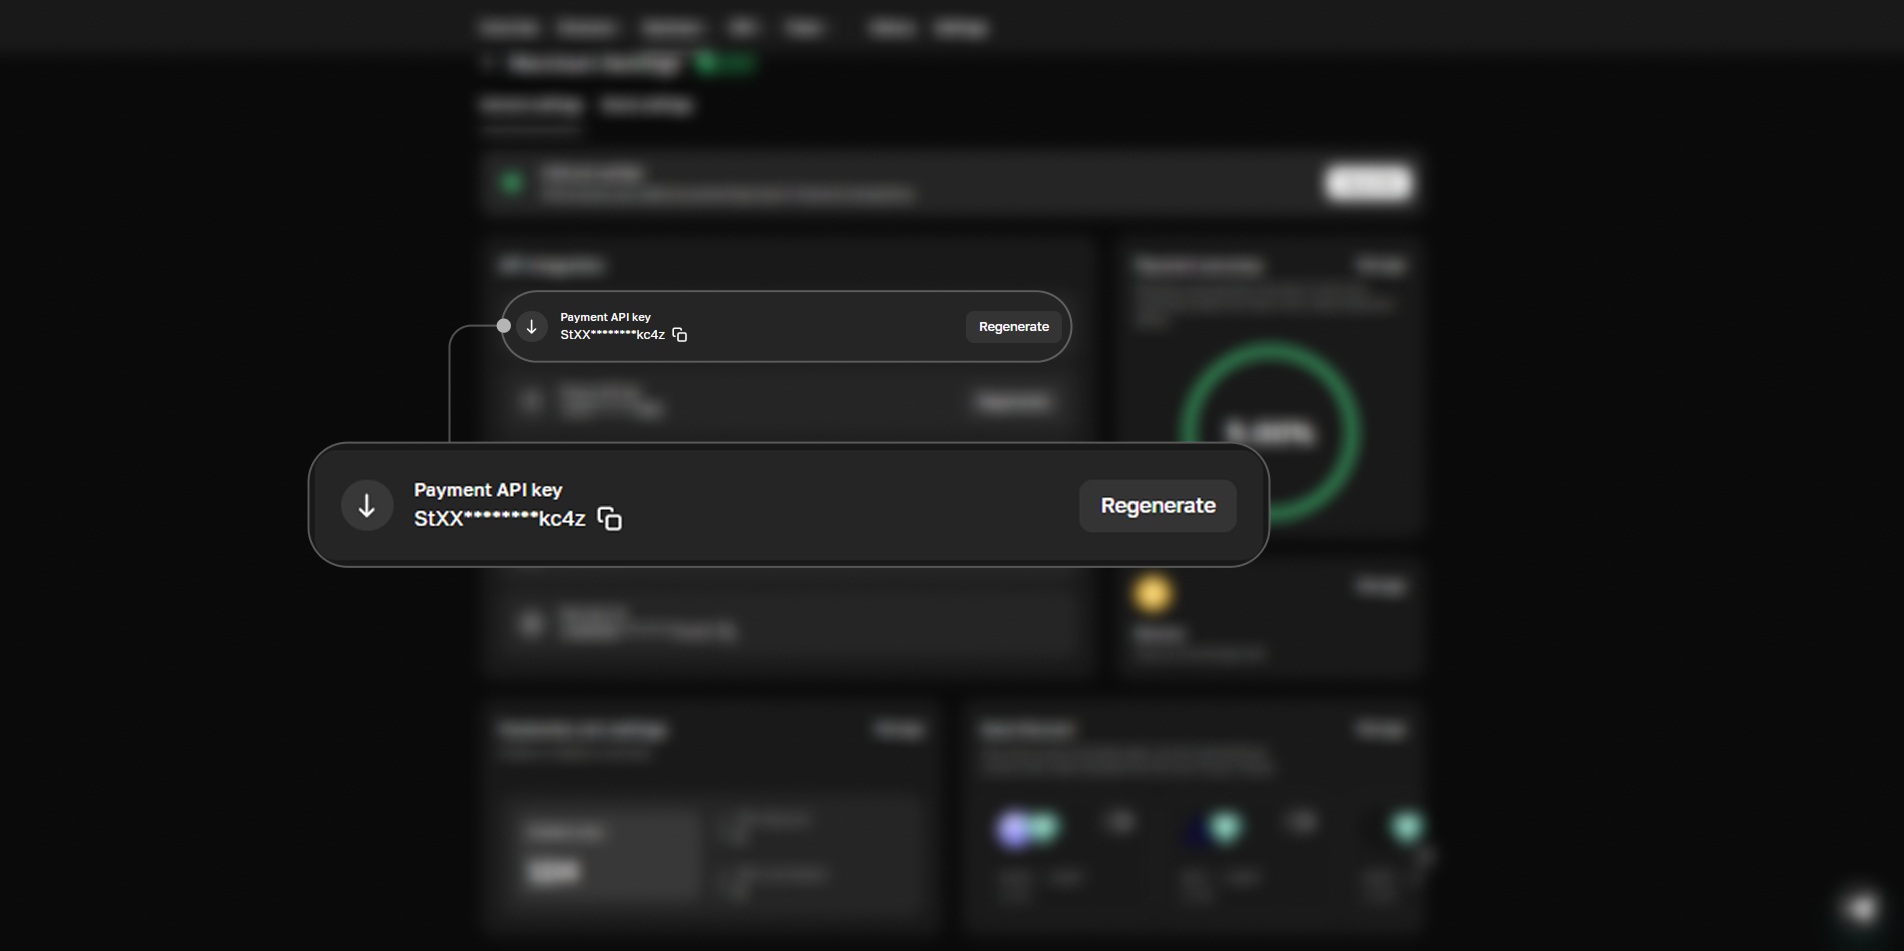
➜ Done!
The API key for withdrawals is located in internal settings.
Please remember that Cryptomus provides comprehensive support to help you with any problems you may face during the integration process. You can reach our support service through the website or in Telegram using the username @cryptomussupport, or write to us at [email protected].
Cryptomus offers a personal manager option. After registration and linking your account in Telegram, the manager will act as your personal assistant and help you with any problems you encounter.
Typical flow for API
You create a payment using Create invoice and show the address to the user.
Users send funds to the address. You can check the payment status using Get payment status or via IPN. Just specify “url_callback” in the Create invoice request to receive IPN messages. We will send a POST request to this URL when the payment status is updated.
The IPN message is similar to a Get payment status message. Here’s when these status messages appear:
- Expired transaction
Flow status: pending ➜ expired
- Completed transaction
Flow status: pending ➜ paid ➜ completed
- Partially paid transaction
Flow status: pending ➜ paid ➜ partially paid
After the payment is completed you can start using the service.
Static address
A static address is a custom solution that allows you to get multiple deposit addresses for your clients, for example, when your site has a personal account and the user has their own balance.
Let’s look at it in more detail with an online store example:
-
Customers register and receive permanent deposit addresses;
-
Buyers send funds to the Cryptomus deposit address. Using IPN, Cryptomus sends the amount and currency info to the online store;
-
We credit funds to the store’s balance in our system. Funds are stored in the currency sent by the buyer;
-
Then the buyer or the store requests a payment from the balance;
-
We withdraw the funds and send them to the store’s or buyer’s address.
At the moment, conversion for static addresses is not available. This feature is in development.
How is the fee formed?
-
The buyer sends funds to the permanent deposit address and pays the network fee.
-
We transfer funds from the deposit address to the balance – the network fee is paid by Cryptomus.
-
We withdraw funds and send them to buyers or to the store’s wallets – the network fee is always paid by the store in both cases.
Note: For payouts the network fee is paid by the store.
Still have questions?
We will be happy to help you and answer all your questions. Just ask a question on the website, by email [email protected] or in Telegram using the username @cryptomussupport.
This content is intended for informational and educational purposes only and is not financial, investment, or legal advice.
Simplify Your Crypto Journey
Want to store, send, accept, stake, or trade cryptocurrencies? With Cryptomus it's all possible — sign up and manage your cryptocurrency funds with our handy tools.
Get Started
