Як використовувати опцію Автоматичної Конвертації: Покроковий Посібник
Зміст
На Cryptomus є безліч різних корисних функцій, які, безумовно, заслуговують на Вашу увагу! Сьогодні ми розглянемо цю тему більш детально, оскільки одна з них виділяється на тлі інших.
Автоконверт-це широко використовувана опція, особливо для бізнесу, яка дозволяє продавцям вести свої справи, заощаджуючи їх час і гроші. Давайте почнемо з докладного опису цієї функції, і далі ви зможете дізнатися про те, як легко включити автоконверт для вашого бізнес-аккаунта.
Що таке Автоматично Конвертаці?
Функція автоматичної конвертації-це вражаючий фінансовий інструмент, який дозволяє користувачам автоматично конвертувати отриману криптовалюту в інші валюти. Використовуючи функцію автоматичної конверсії, продавці можуть легко та швидко конвертувати всі свої вхідні платежі в режимі реального часу, отримуючи найкращі курси та заощаджуючи гроші на волатильності.
Крім того, більше не потрібно турбуватися, оскільки вам більше не потрібно пам'ятати про обов'язкову конвертацію платежів. Ця незамінна функція робить все за користувача автоматично, значно економлячи час і оптимізуючи бізнес-процеси.
Як це працює?
Як ми вже пояснювали, функція автоматичної конвертації дозволяє конвертувати всі отримані кошти в ті валюти, які ви віддаєте перевагу. Це досить зручно, особливо для тих, кому подобається працювати з певною монетою або кому просто зручно зберігати всі активи в одній валюті. До речі, принципи роботи досить очевидні і прості для розуміння.
Як тільки рахунок, згенерований користувачем, буде оплачений, функція auto-convert автоматично перетворює отримані активи в криптовалюту, зазначену Продавцем в обліковому записі business wallet. До речі, на Cryptomus за цю функцію не стягується комісія, тому використовувати автоматичну конвертацію вигідно і ефективно. Для вашої зручності далі ми представимо докладний посібник про те, як почати використовувати автоматичну конвертацію для здійснення платежів у вашому бізнесі.

Які Переваги Автоматичної Конвертації?
Перш ніж ми перейдемо до процесу включення цієї функції, давайте подивимося, які переваги вона дає вам.
-
Захист від волатильності криптовалют є основною перевагою опції автоматичної конвертації, оскільки, негайно конвертуючи одну валюту в іншу, продавці можуть уникнути різких коливань цін на кріптовалютном ринку, які можуть відбутися буквально за лічені хвилини.
-
Друга перевага безпосередньо пов'язана з першою. Знаючи про волатильність, користувачі часто насилу встигають конвертувати одну отриману криптовалюта в більш стабільну. Часто процес конвертації займає достатньо часу, щоб курс конкретної монети змінився. Автоматична конвертація робить все автоматично, запобігаючи зміні вартості коштів і заощаджуючи час і гроші користувача.
-
Механізм автоматичного конвертування сам по собі є його істотною перевагою, оскільки криптовалюта конвертується з високою швидкістю і точністю в режимі реального часу, що дозволяє продавцям отримувати кращі ціни.
Покрокове керівництво по використанню Автоматичної Конвертації
Щоб повною мірою використовувати можливості автоматичної конвертації, виконайте наступні дії.
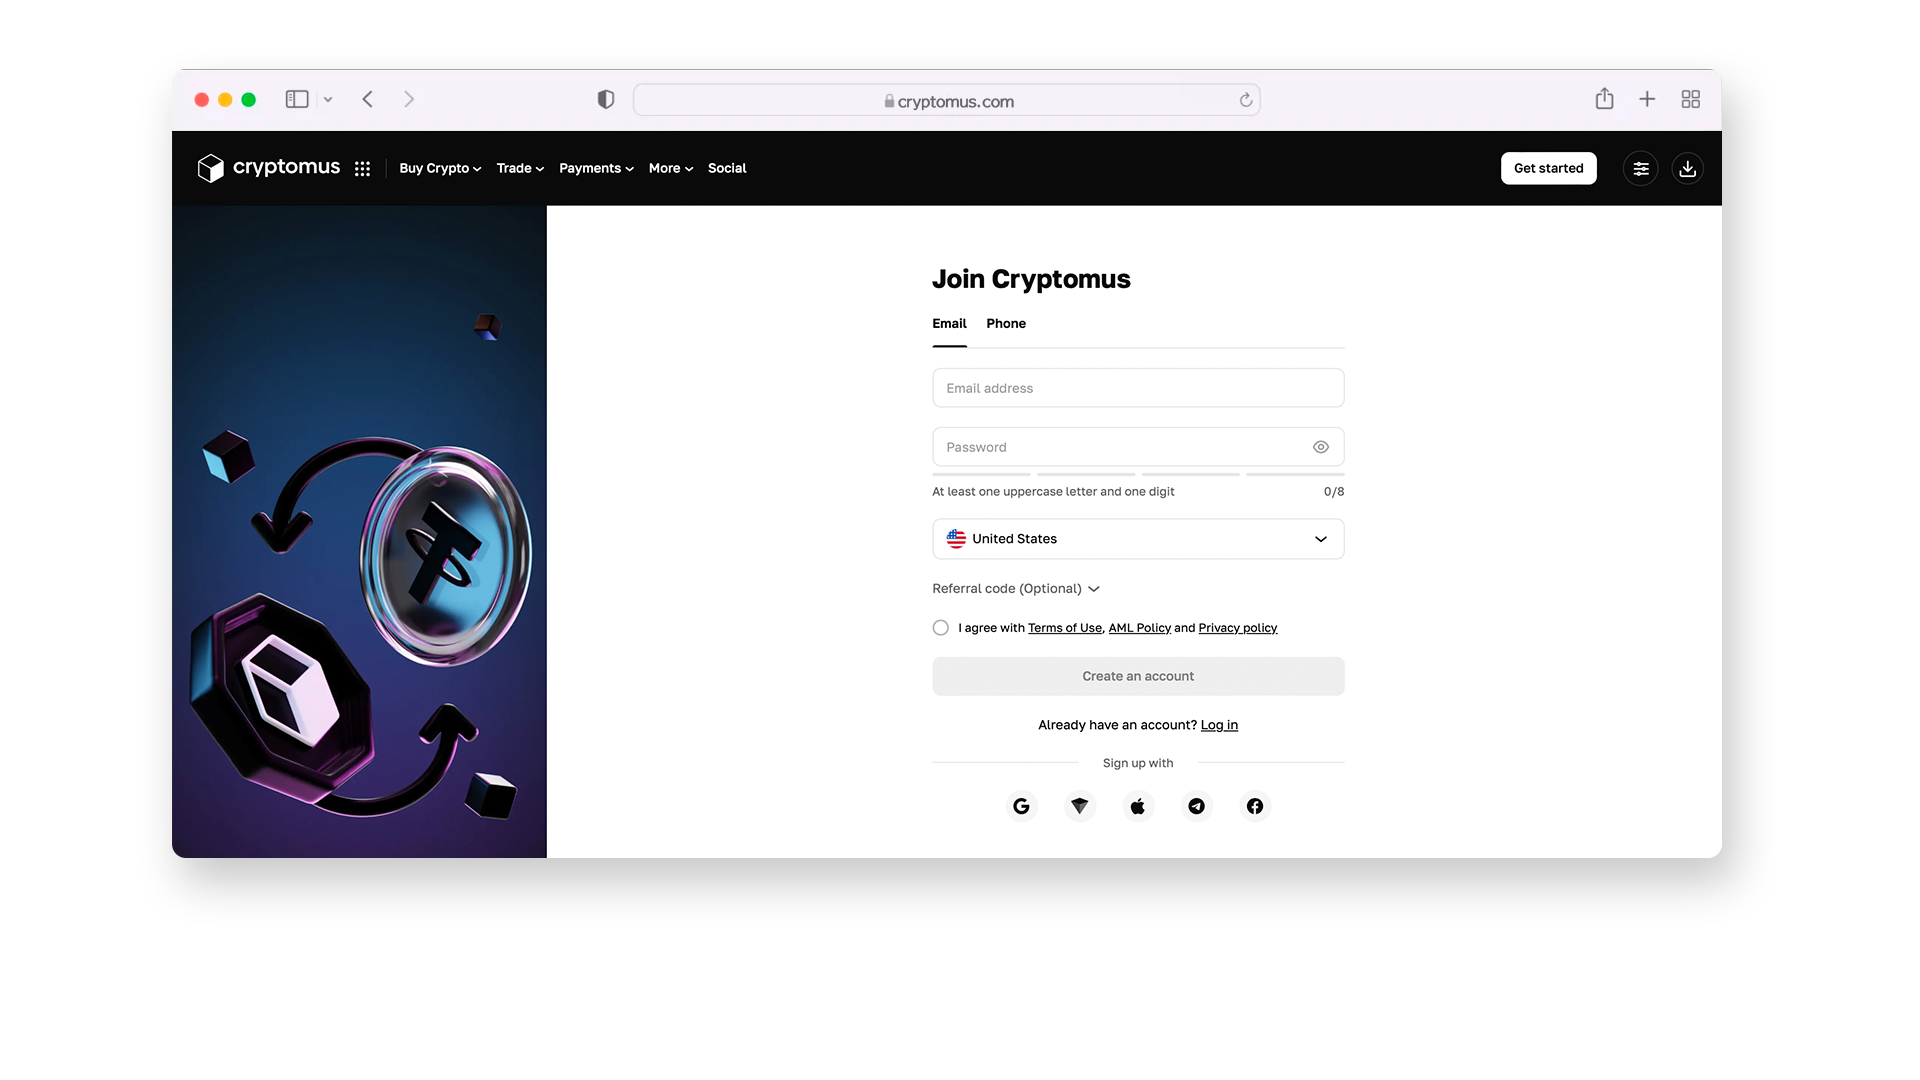
Крок 1. Перш за все, зареєструйтесь створіть обліковий запис на Cryptomus, якщо у вас його ще немає. Ви можете вибрати будь-який відповідний спосіб реєстрації: за допомогою номера телефону, електронної пошти, безпосередньо через Telegram, Apple ID, Facebook або прив'язавши обліковий запис до свого гаманця Tonkeeper.
Крок 2. Після реєстрації ви зможете переглянути свою панель огляду, на якій доступні всі ваші гаманці: особисті, бізнес-гаманці та p2p-гаманці. Для активації автоматичної конвертації вам обов'язково потрібно, щоб ваш бізнес-гаманець був готовий.
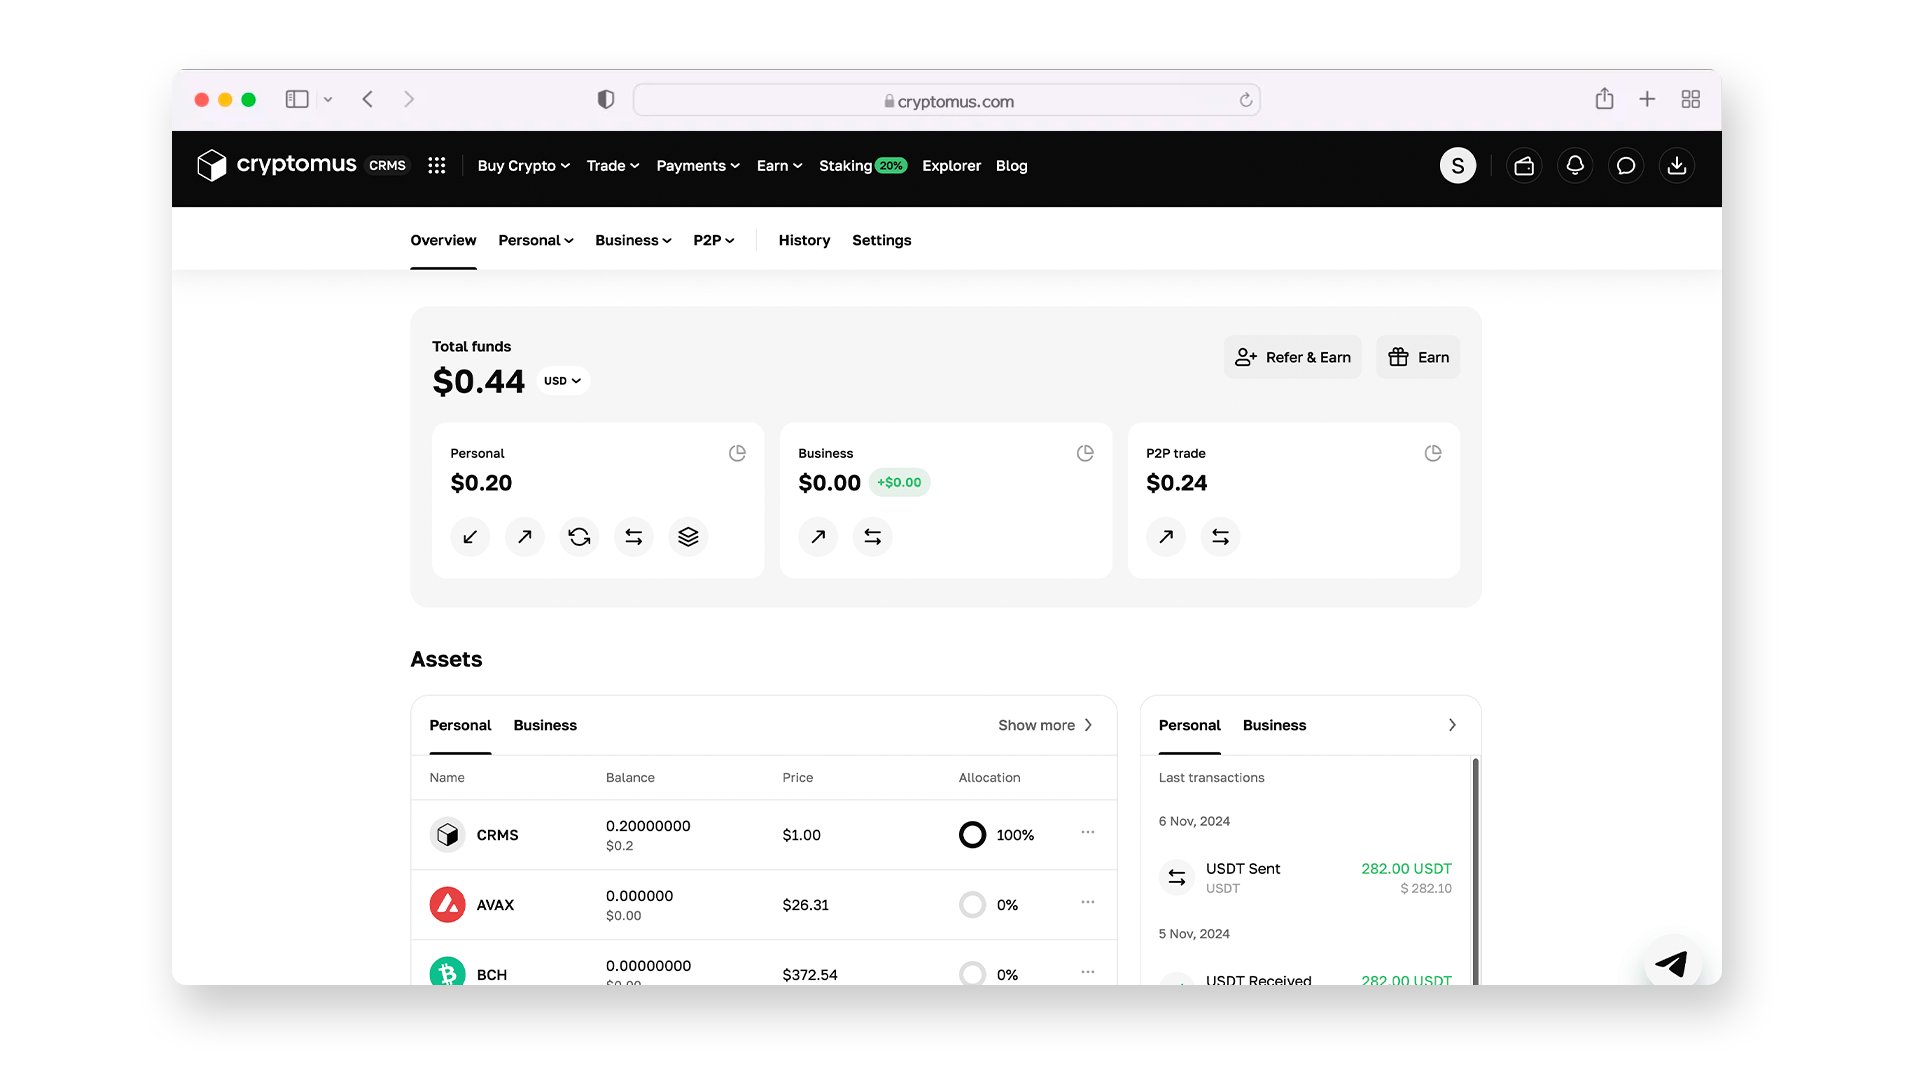
Крок 3. Щоб отримати доступ до вашого бізнес-гаманця, необхідно пройти процедуру KYC (знай свого клієнта). Нижче наведено наочне пояснення того, як це можна зробити.
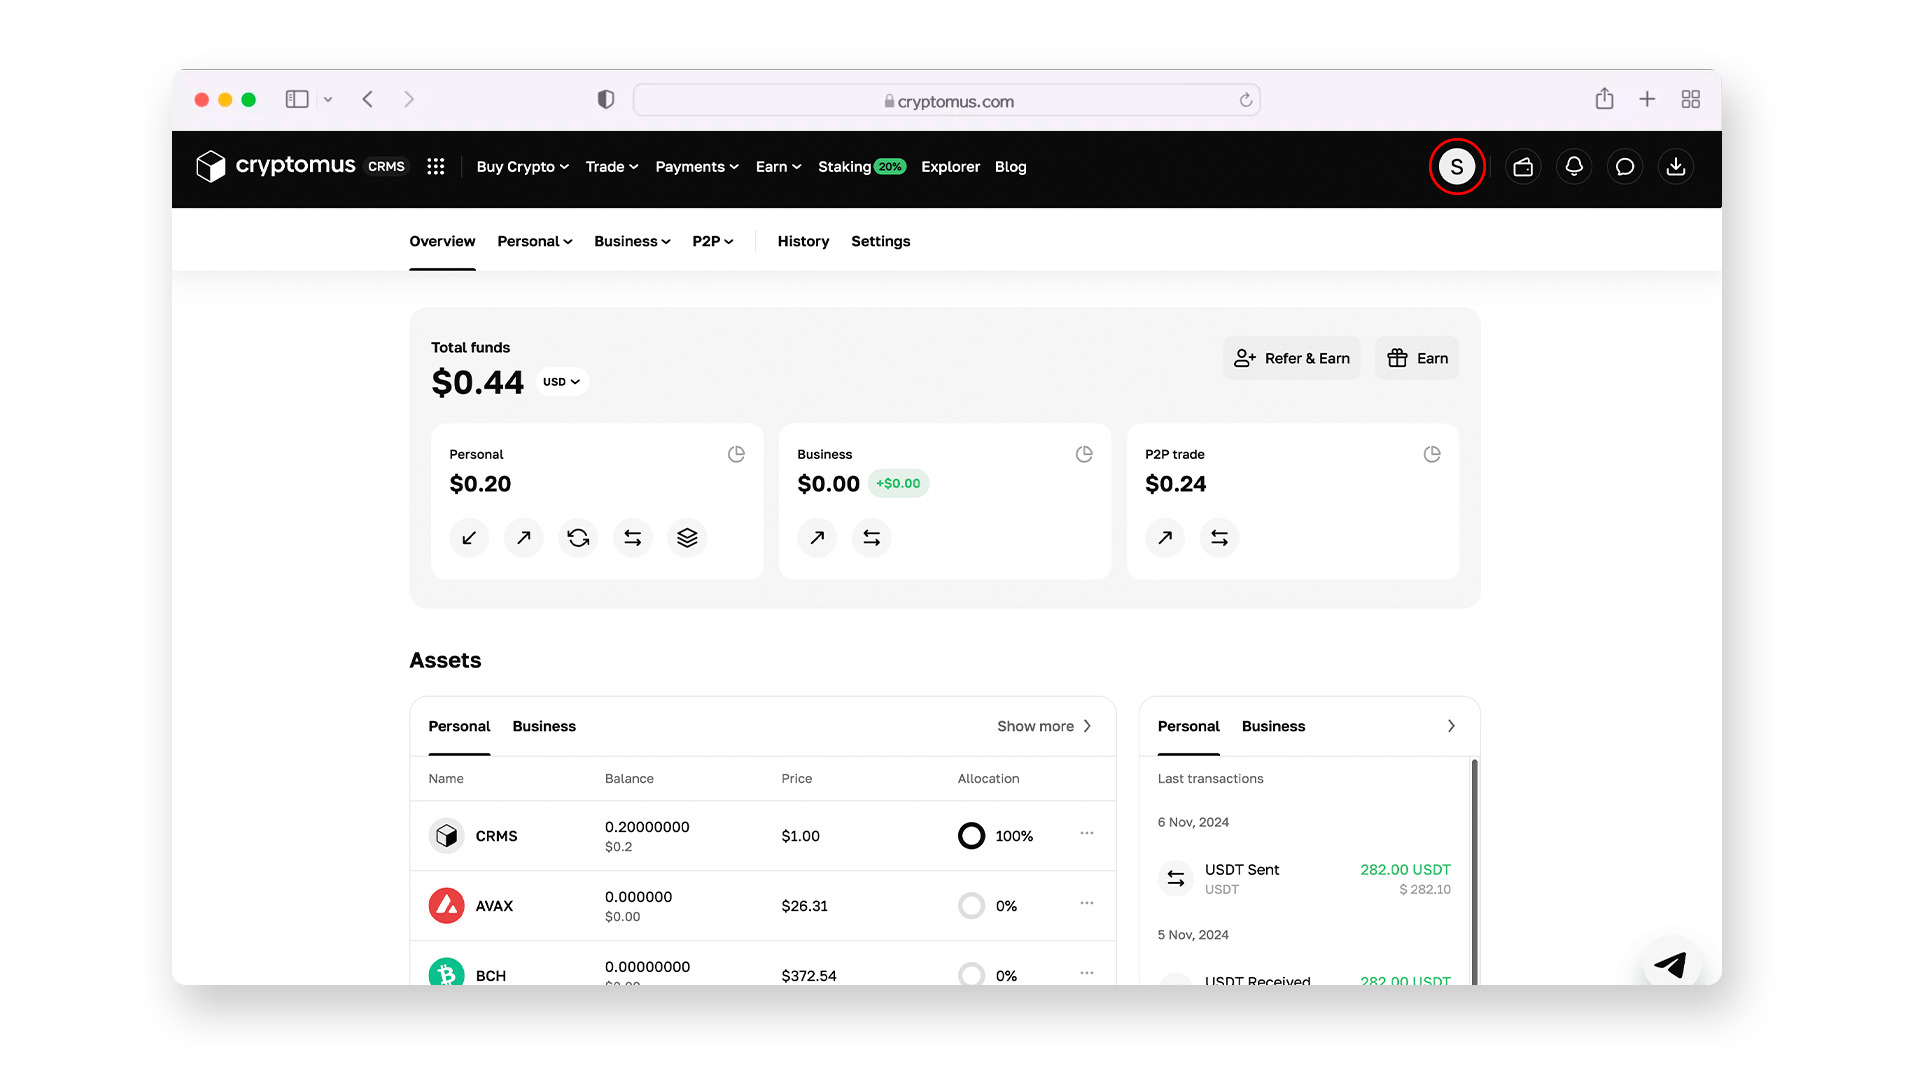
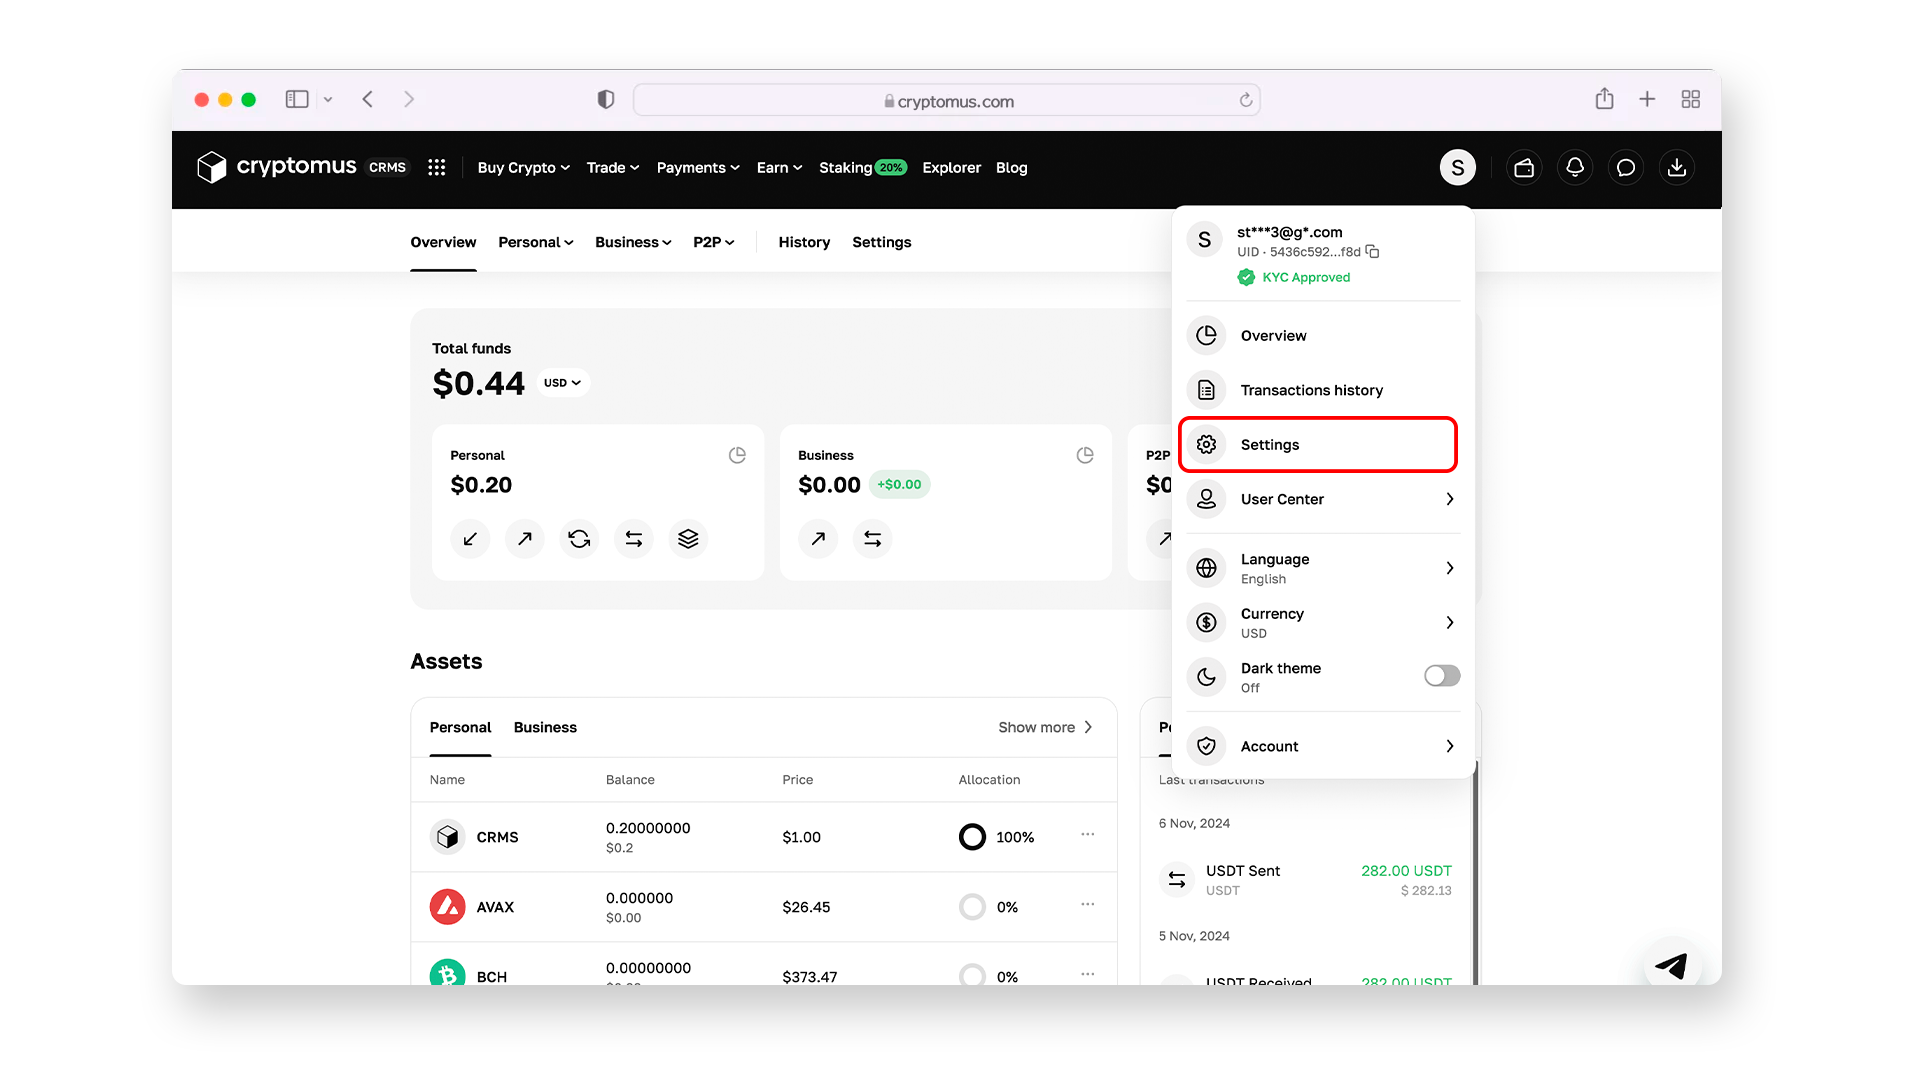
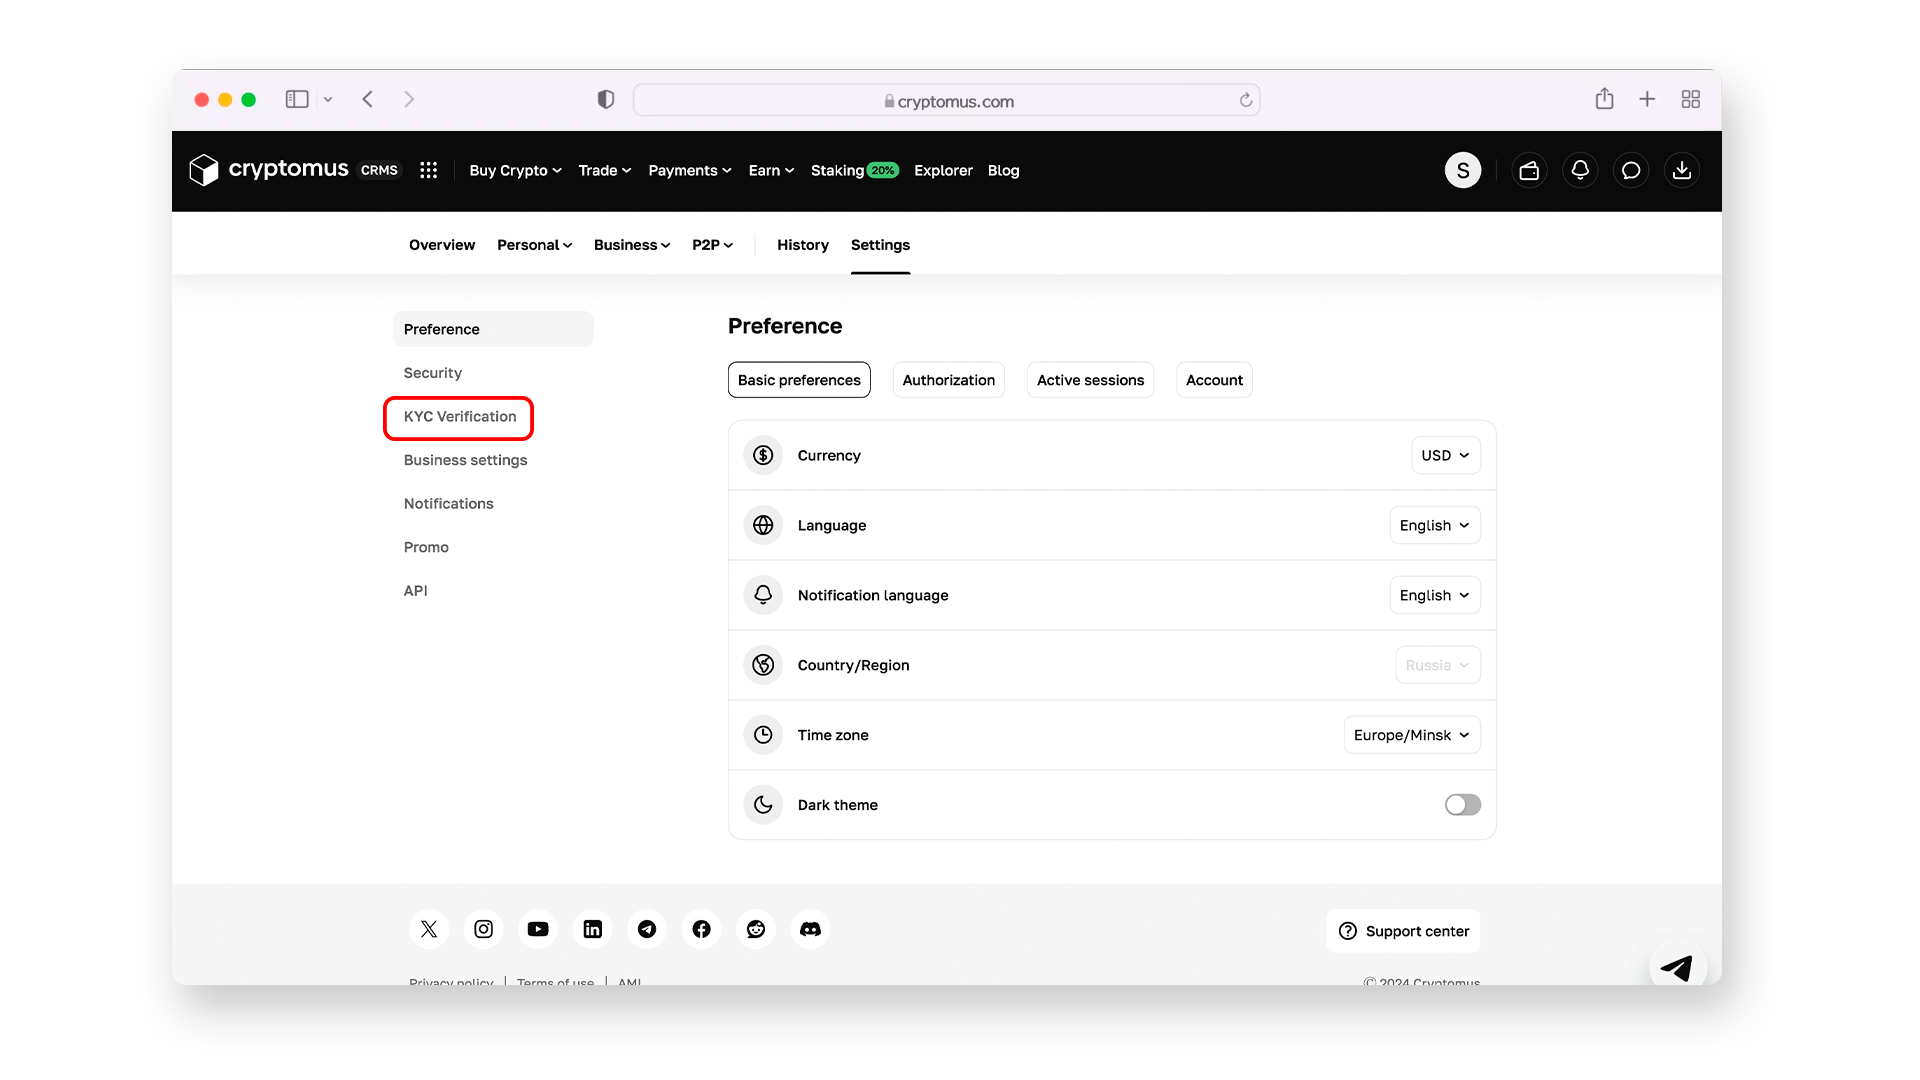
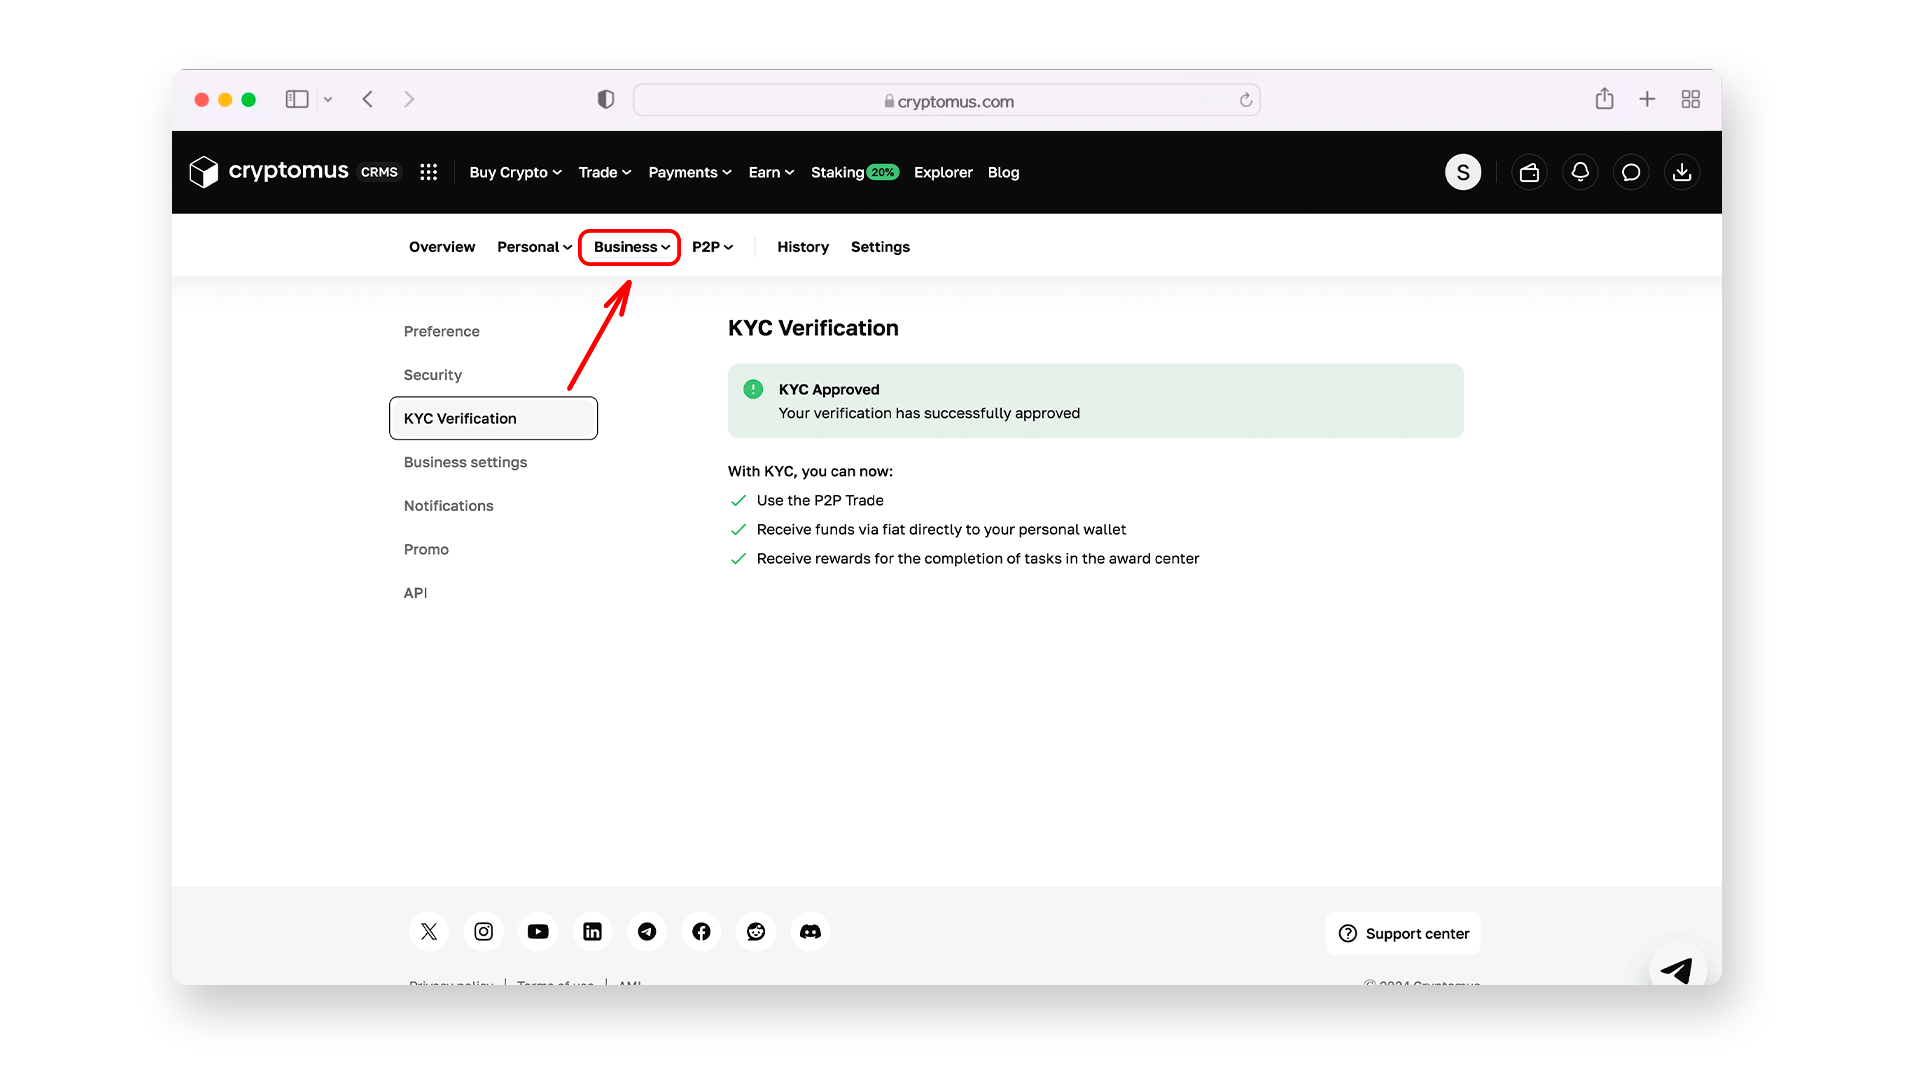
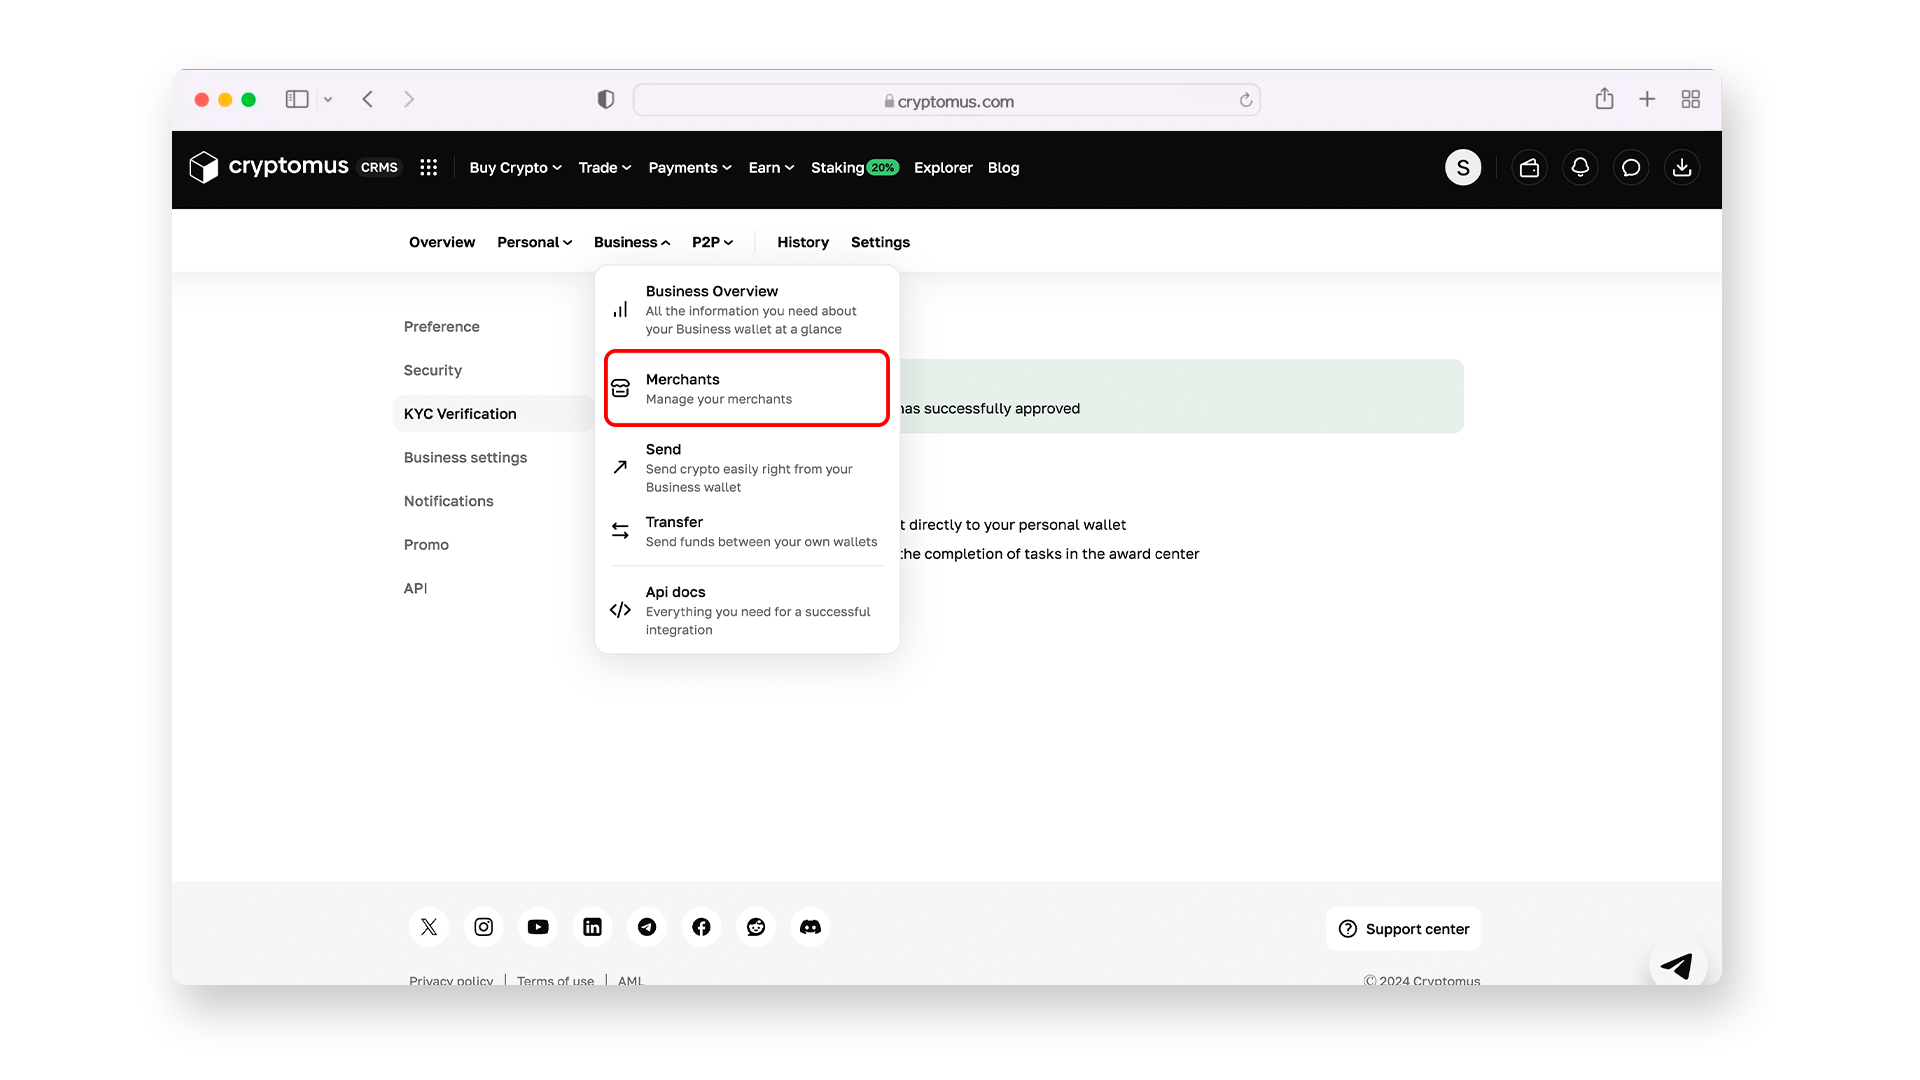
Крок 4. Коли ви пройдете процедуру KYC, саме час перейти до справи! Натисніть на розділ " бізнес "над вашою пройденою верифікацією, і ви побачите меню, в якому Вам слід вибрати"продавці".
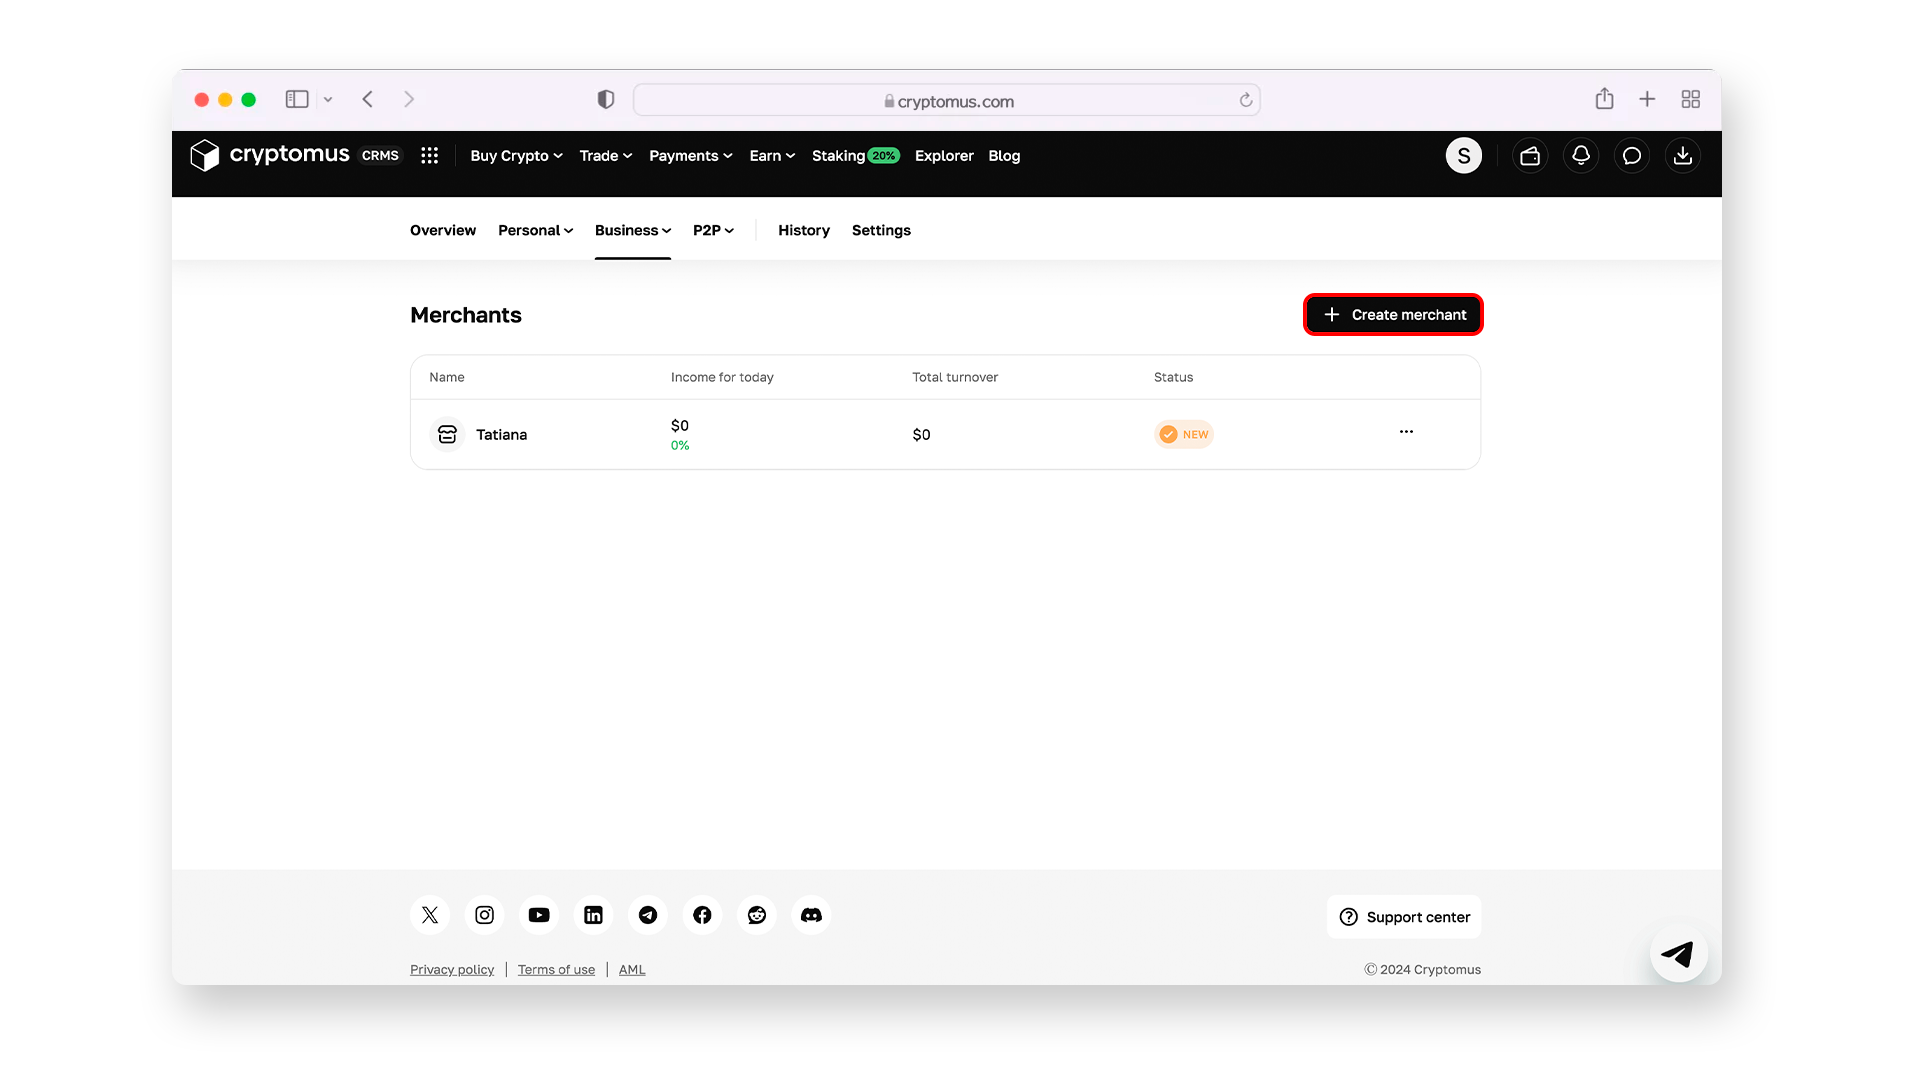
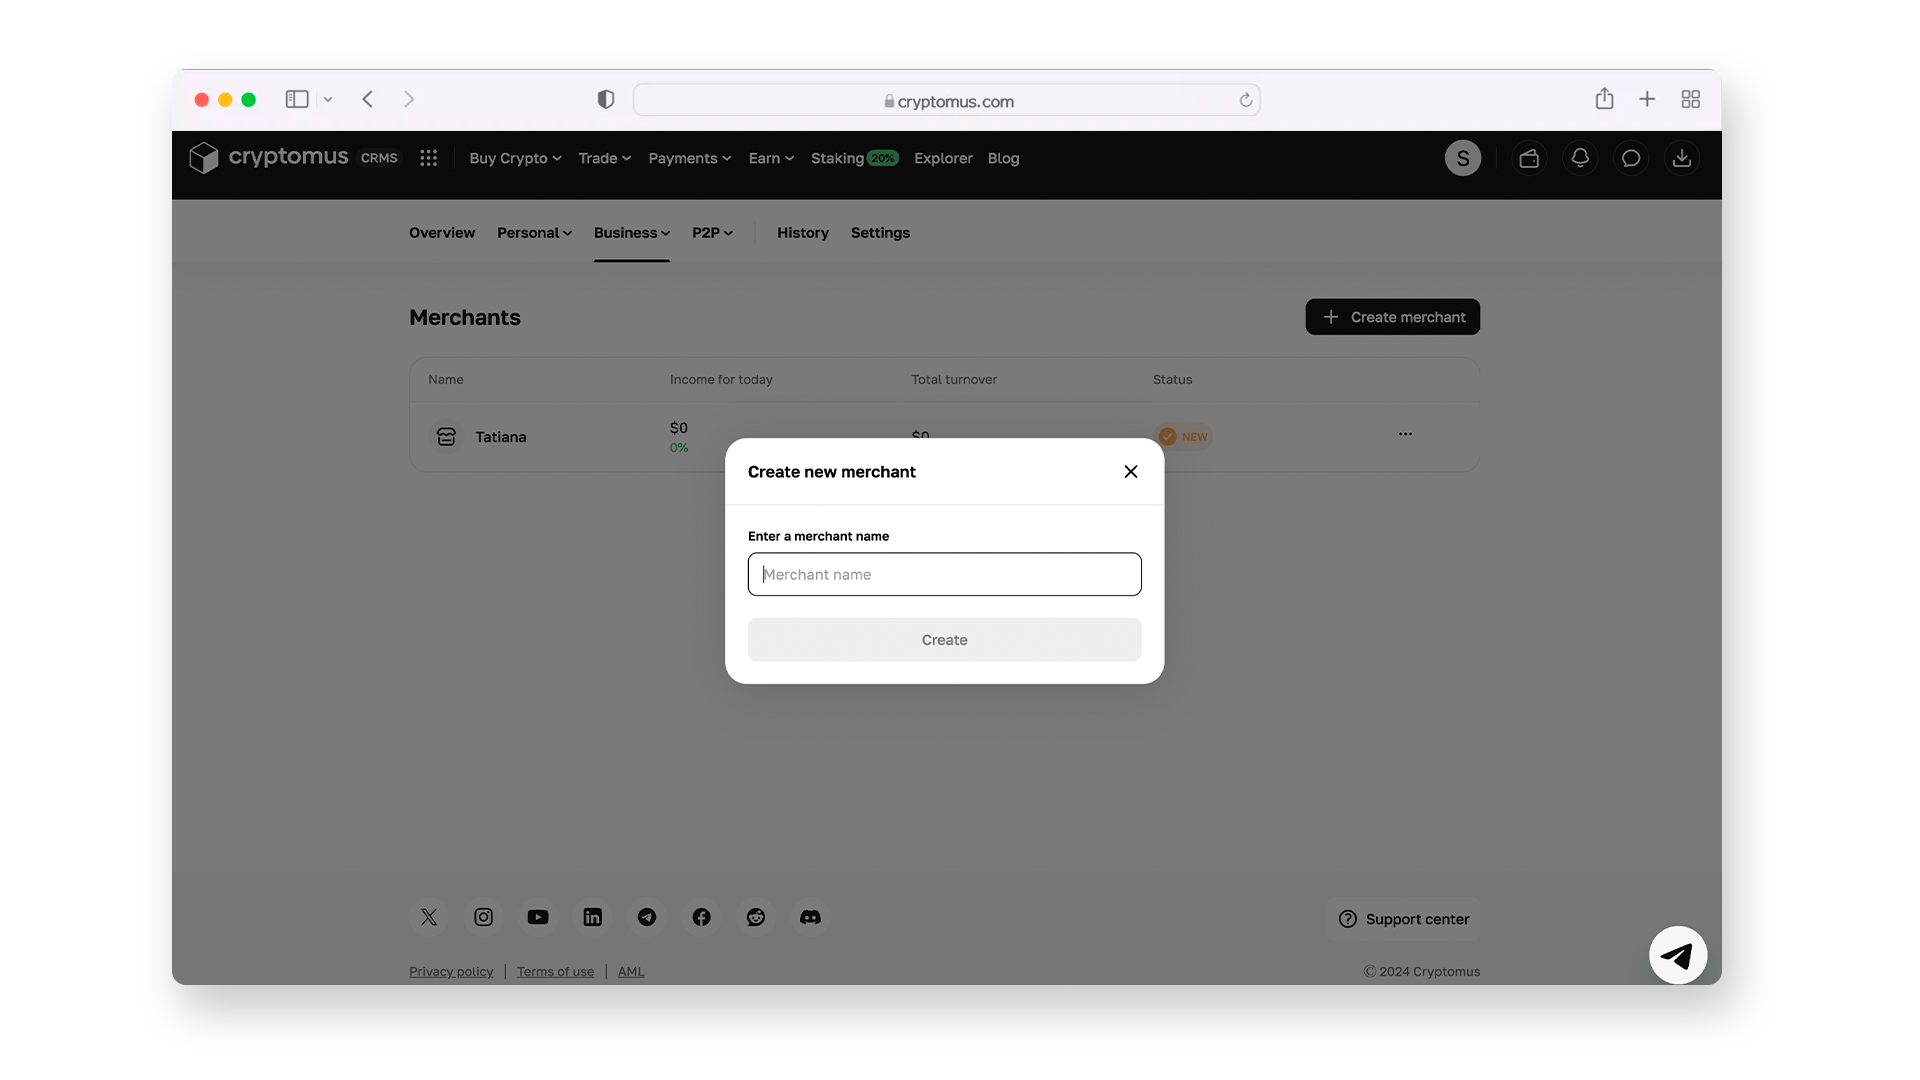
Крок 5. Тепер ви перебуваєте в розділі "продавці". Тут вам потрібно створити свій перший або новий рахунок продавця. Натисніть "+ Створити продавця", введіть ім'я та натисніть"Створити".
Крок 6. Натисніть на свого нового зареєстрованого продавця та знайдіть кнопку "Налаштування продавця".
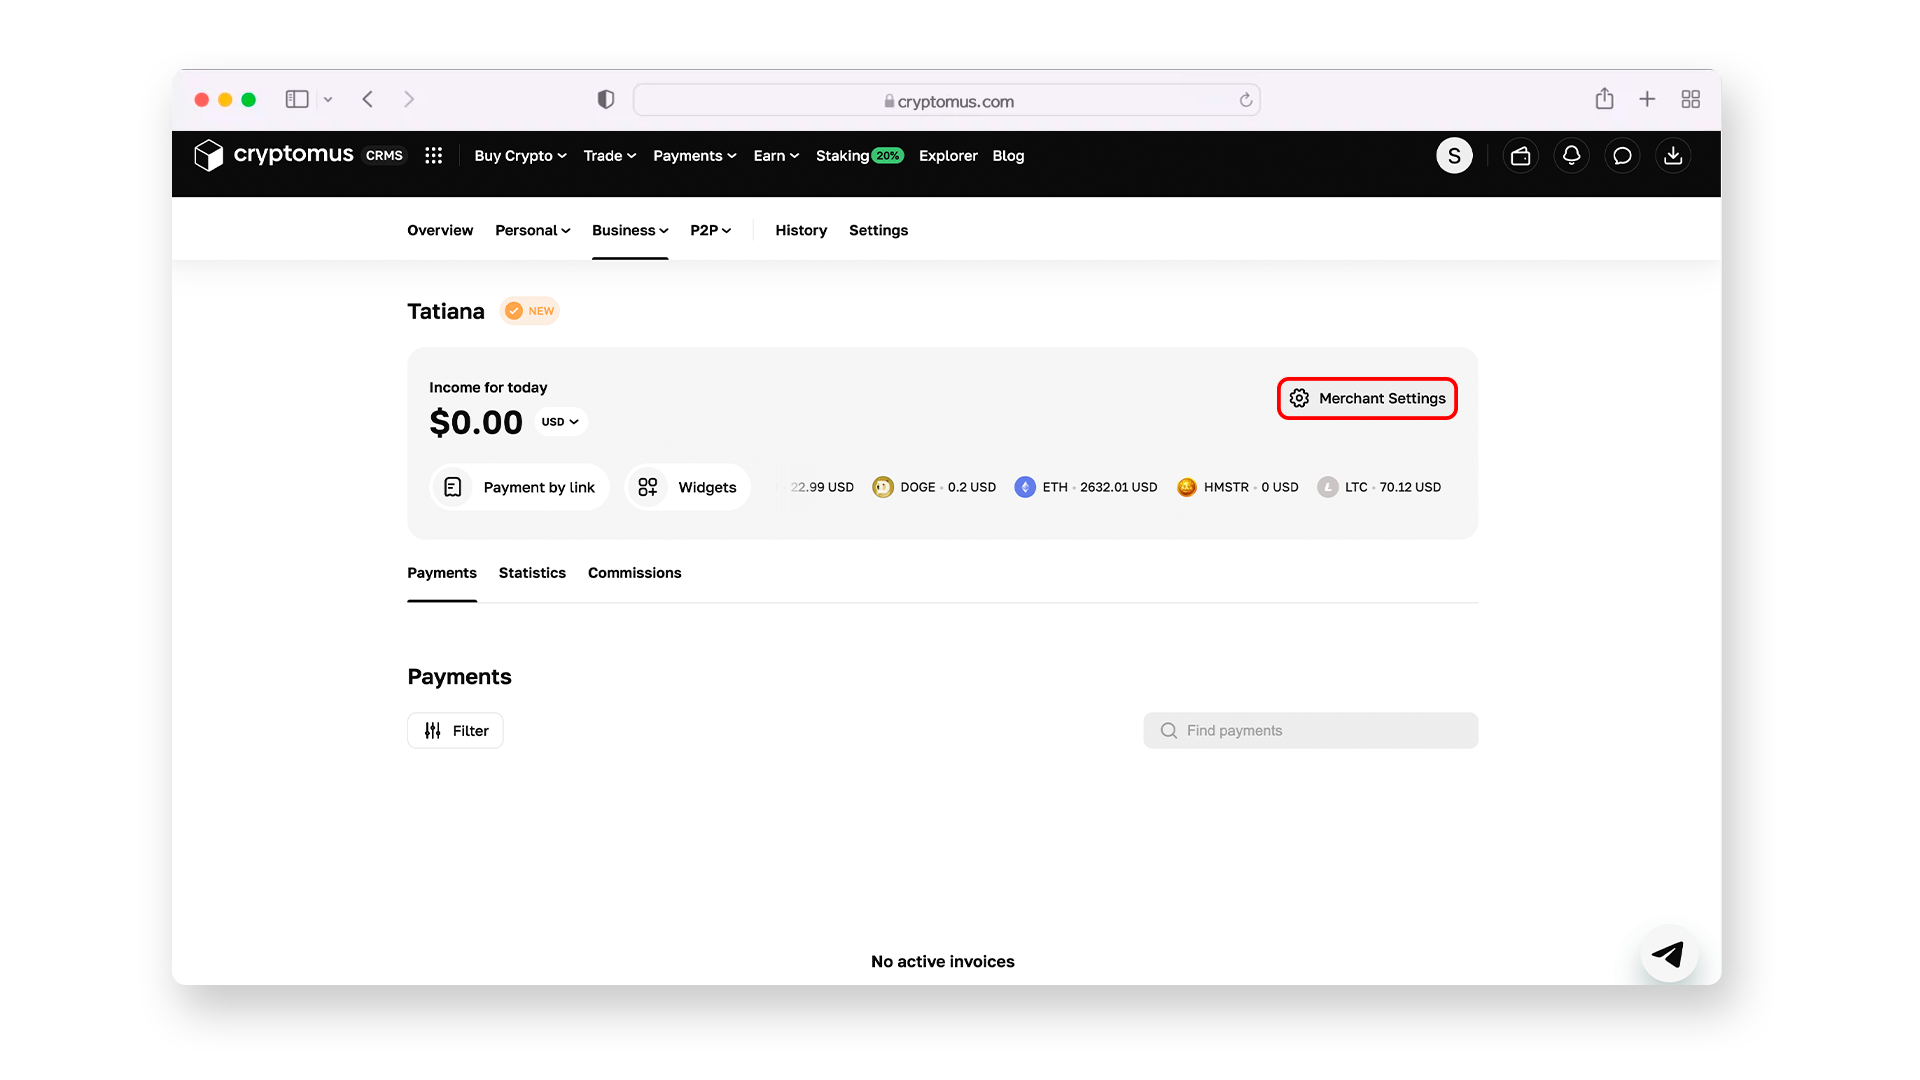
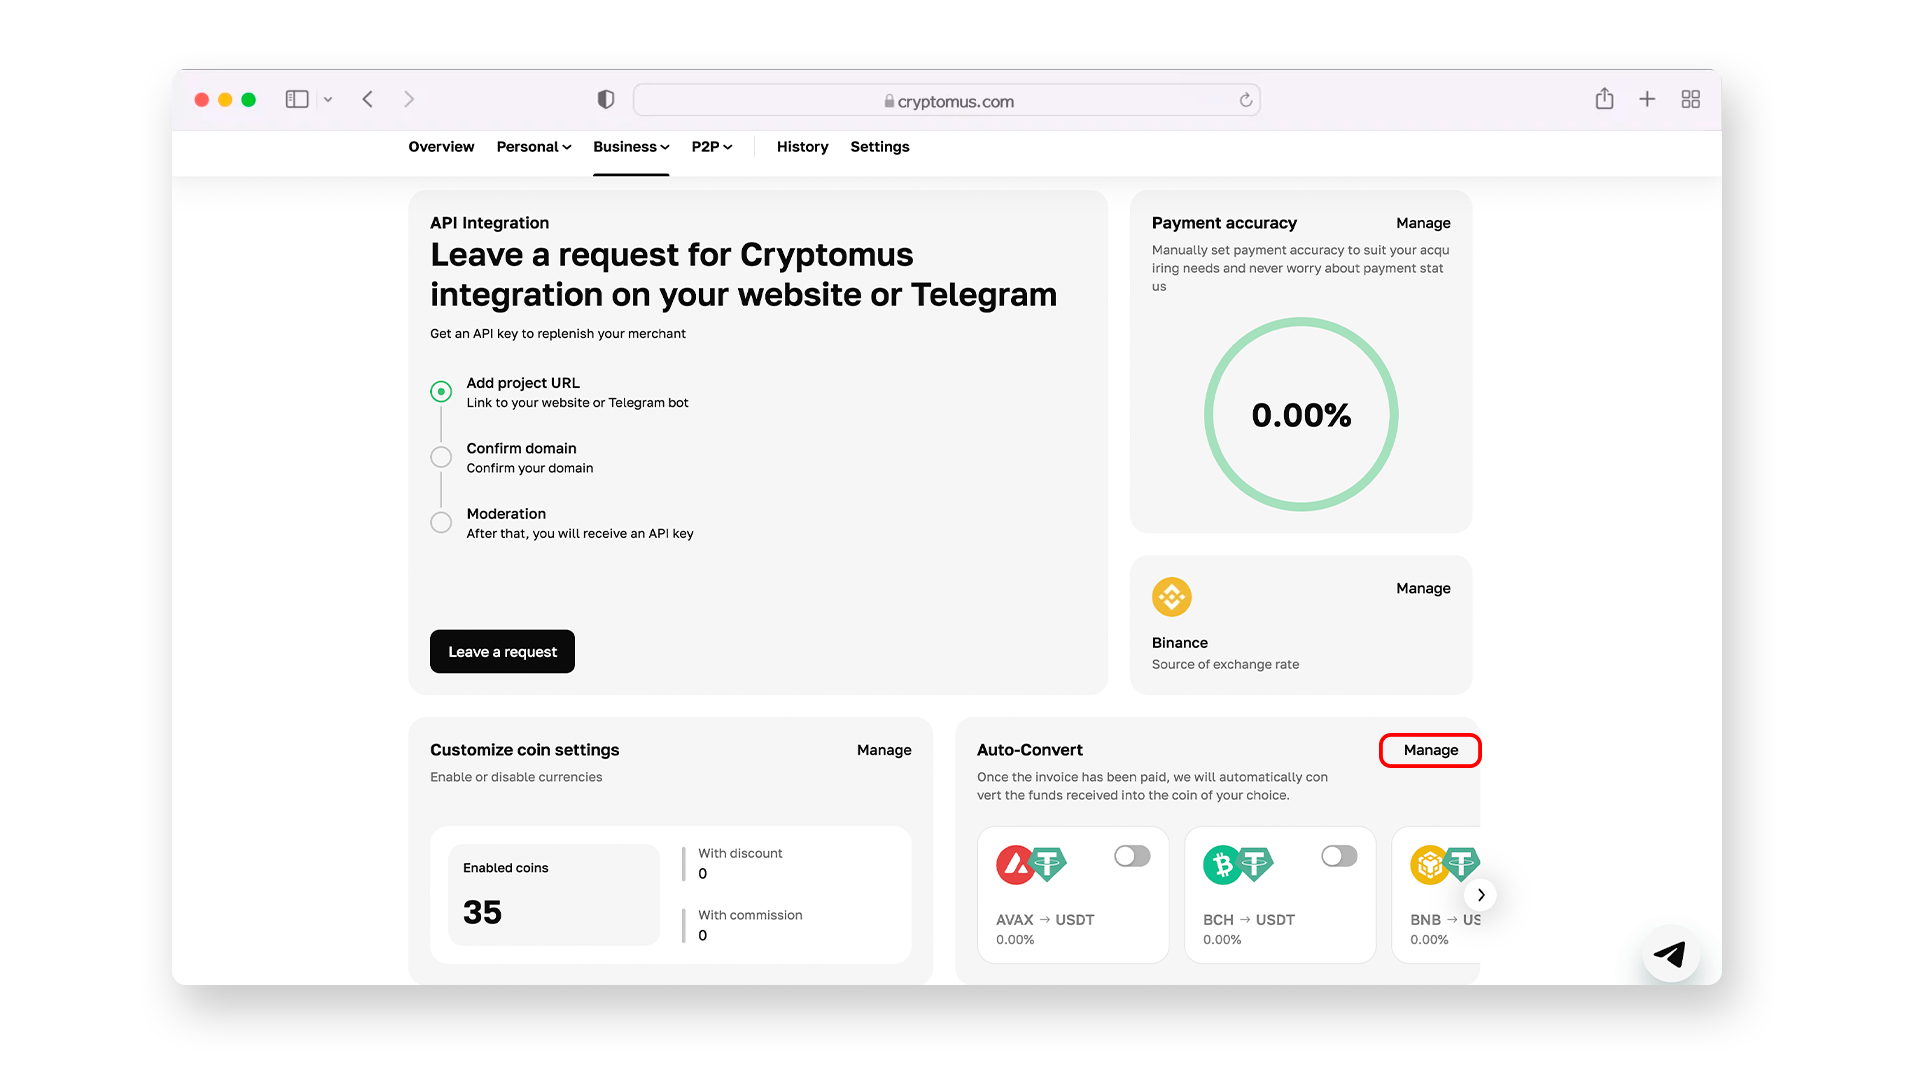
Крок 7. Далі ви переходите в розділ налаштувань продавця. Тут ви можете активувати різні функції для свого бізнес-гаманця і здійснити процес інтеграції. Також у нижньому правому куті ви можете побачити розділ "автоматичне перетворення". Натисніть на нього, щоб продовжити.
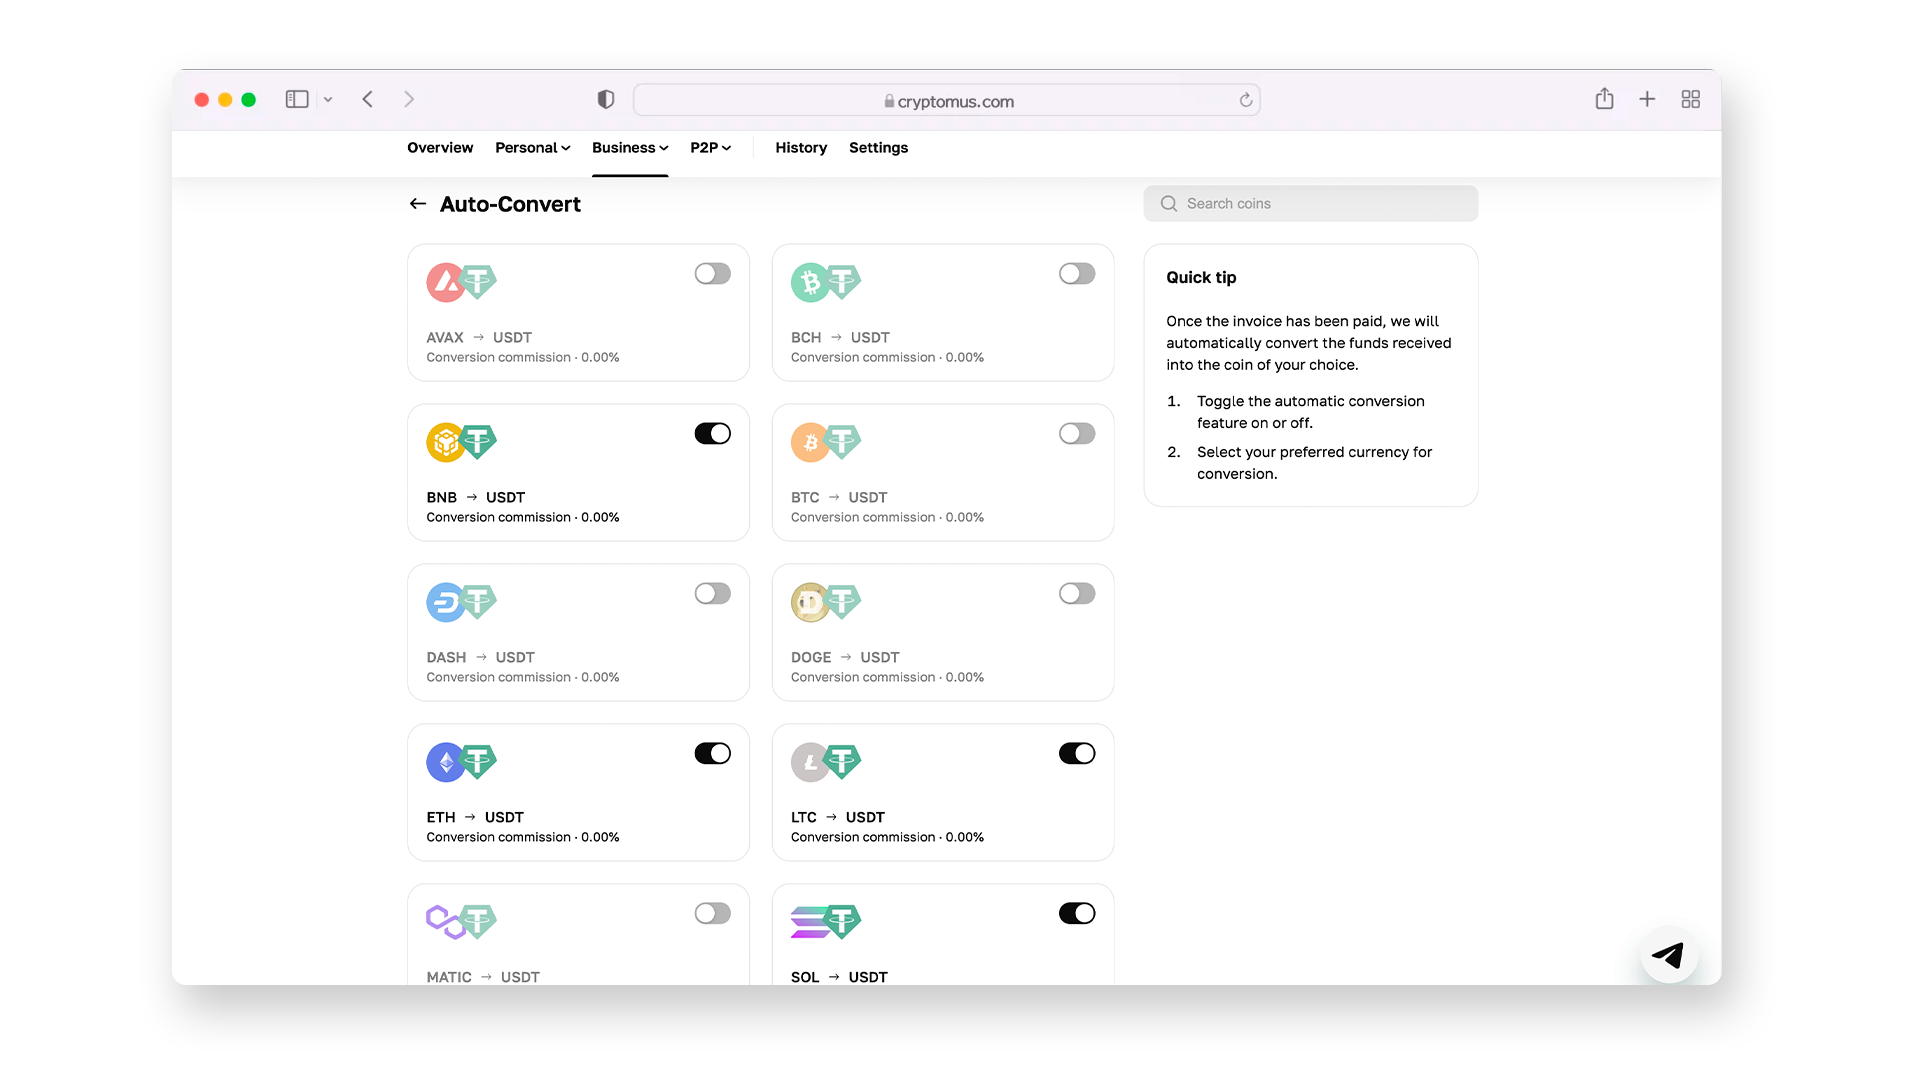
Крок 8. Процес майже завершено! Залишилося тільки включити конвертацію певних криптовалюта на ваш смак і відповідно до ваших потреб. Як тільки ваш згенерований рахунок буде оплачений, функція автоматичної конвертації автоматично перетворює отримані активи в ту криптовалюту, яку ви віддаєте перевагу.
Автоматична конвертація необхідна компаніям будь-якої ніші. Незважаючи на те, що вона рятує користувачів від волатильності криптовалюта, автоматична конвертація економить ваші зусилля і час для більш важливих угод, пов'язаних з управлінням вашої криптовалюта.
Ми щиро сподіваємося, що ця стаття була корисною, і тепер ви повністю ознайомилися з функцією автоматичної конвертації На Cryptomus!
Спростіть свою криптовалютну подорож
Хочете зберігати, надсилати, приймати, робити ставки або торгувати криптовалютами? З Cryptomus все можливо — зареєструйтеся та керуйте своїми криптовалютними коштами за допомогою наших зручних інструментів.
Початок роботи


